
Check #1 – Ohmmeter:
The Ford shop manual states when checking for defective glow-plugs, use a test light, and if you have continuity, they are O.K., then the trouble shooting schematic tells you to check connections, then replace the controller. This may not be true….
High mileage, weak plugs will still have continuity, but not get hot enough. The bigger problem is, when deteriorated, their resistance changes, which fools the controller, triggering it to shut off the plugs too soon for proper starting. Good Plugs have Resistance Values between 0.1 and 0.6 ohms. More resistance shows plugs in need of replacement. Check plugs on a cold engine, as engines at operating temperature will give glow plugs an increased resistance reading.
It’s generally agreed on that plugs last on average 60,000 to 80,000 miles. Many after market brands of parts are as good as, sometimes better that the factory brand, however some factory components (especially electronic) are highly engineered to be compatible with other related parts such as the genuine Navistar (Beru Part # ZD-9) glow plugs. These Plugs are available at a reasonable price at your Local Autozone.
Check # 2 – Ammeter:
Another tool for glow plug testing is a standard +-30 Amp ammeter. Glow plugs can fail in one of 2 ways – either short or open. 6 inches of AWG #12 wire and standard male/female automotive bullet connectors is all you need.
Testing glow plugs with an open a continuity meter or Ohmmeter will work, but not if the glow plug is shorted. A shorted glow plug will pass current but it won’t get hot, at least at the tip. When a resistive heating element gets hot its resistance goes up and the current flow for any given voltage goes down. When you put the ammeter in series with a glow plug and activate the relay the current will spike to about 40 Amps and decay to about 15 Amps over a 3 to 5 second period. If it’s shorted the current will just go to 40 Amps and stay there because since the current is not flowing through the element (shorted at base of plug) heat build up doesn’t occur and current doesn’t decay.
Replacing:
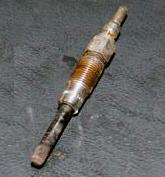
Blow away dirt around the base of the plugs prior to removing them. Clean the area of the threads and insure dirt does not fall into the cylinders. To remove the glow plugs you’ll want to use an 8mm deep socket. Remove the wire from the top of the glow plug and slide your socket down and unscrew the glow plug. It’s a lot easier to pull the glow plug out, once it’s loose, by slipping a short length of rubber tubing over the top and simply lifting it out. Be careful at this point, it is unlikely but if the glow plug is adequately burnt and damaged the tip could break off in the cylinder. If this happens the head will need to be removed to get the part out before the engine can be started.
Use Never Seize on the new glow plug threads when replacing so the threads don’t seize in the cylinder heads. Remember that torque values for plugs lubricated with Never seize should be reduced accordingly.
Always replace glow plugs as a complete set not individually. As glow plugs age heat output per given current flows change. Replacing individual units will lead to cold jug starts (rough with white smoke) and generally harder starts in cold weather.