

On Christmas morning 2019, I began pulling away hard from a traffic light, when suddenly the 3.5L Ecoboost in my 2016 Ford Expedition stumbled a couple of times. It suddenly lost power like it wasn’t running on all 6-cylinders, and the check engine light was blinking. I turned around and headed home, and after a short distance, the check engine light stopped blinking, and the truck seemed to run smooth again.
Trouble Codes:
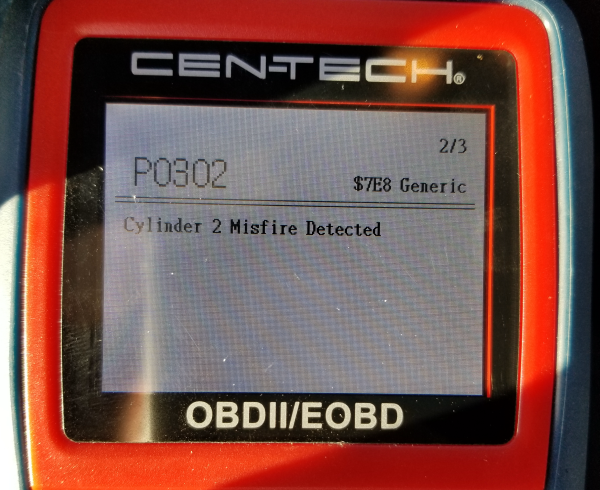
When I got home I scanned the truck for trouble codes, and discovered these codes:
P0300 (Random/Multiple Cylinder Misfire Detected)
P0302 (Cylinder 2 Misfire Detected)
P0304 (Cylinder 4 Misfire Detected)


What Can Cause A Misfire Code:
Worn out / faulty spark plugs.
Bad ignition coil.
There is a Technical Service Bulletin (TSB 14-0180) for the 2011-2013 Ford F-150 that suggests that you check the spark plugs for carbon tracks, and replace the plugs and boots if carbon tracks are found.
Since the 3.5L Ecoboost in my Expedition has 79,000 miles on the original spark plugs, I decided to replace all (6) spark plugs with new ones.
Tools & Parts Needed:
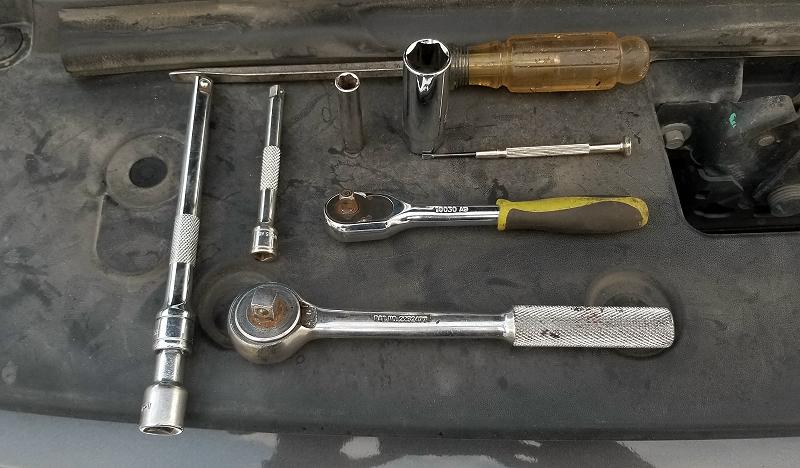
3/8-inch ratchet and extension
5/8-inch spark plug socket for 3/8-inch ratchet
1/4-inch ratchet and extension
8mm (or 5/16-inch) socket
Flathead screwdriver
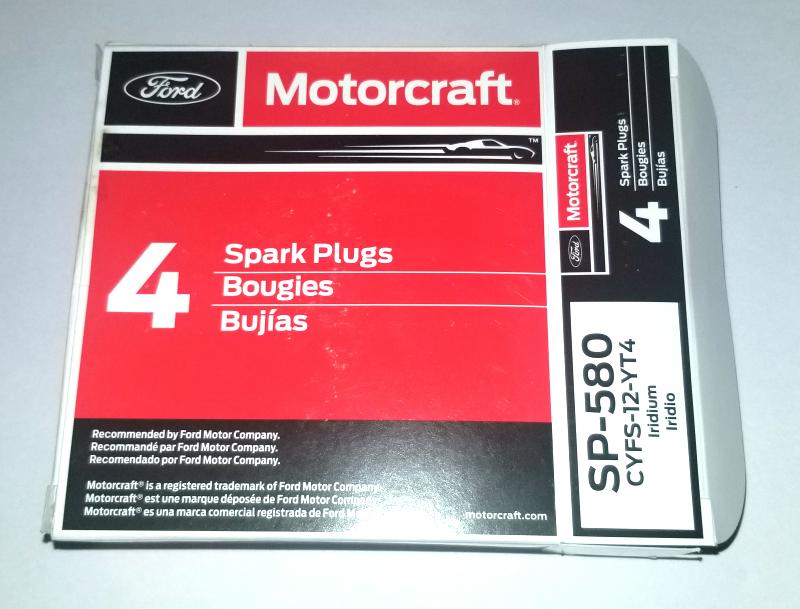
(6) Motorcraft SP-580 (CYFS-12-YT4) spark plugs.
NOTE CYFS-12-YT4 replaced the original CYFS-12-YT3 spark plug.
Procedure:
- Disconnect battery (since I’ll be unplugging the coils and injection pump, I decided to disconnect the battery)
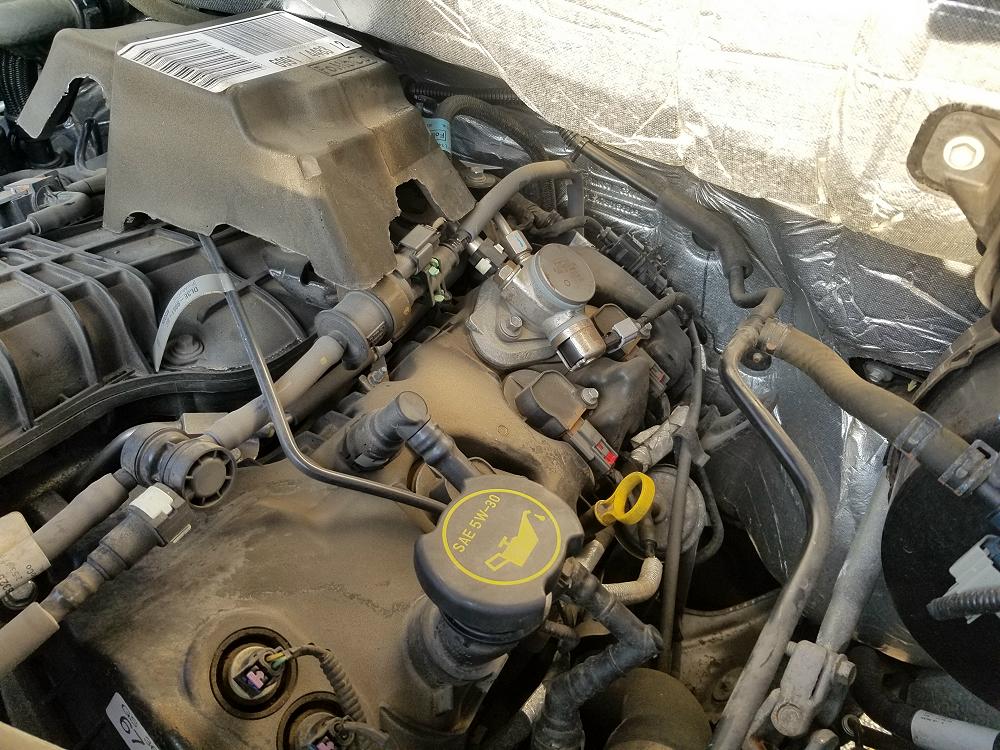
- Remove the engine oil filler cap, and remove the plastic engine cover by lifting up and pulling forward.
- Replace oil cap
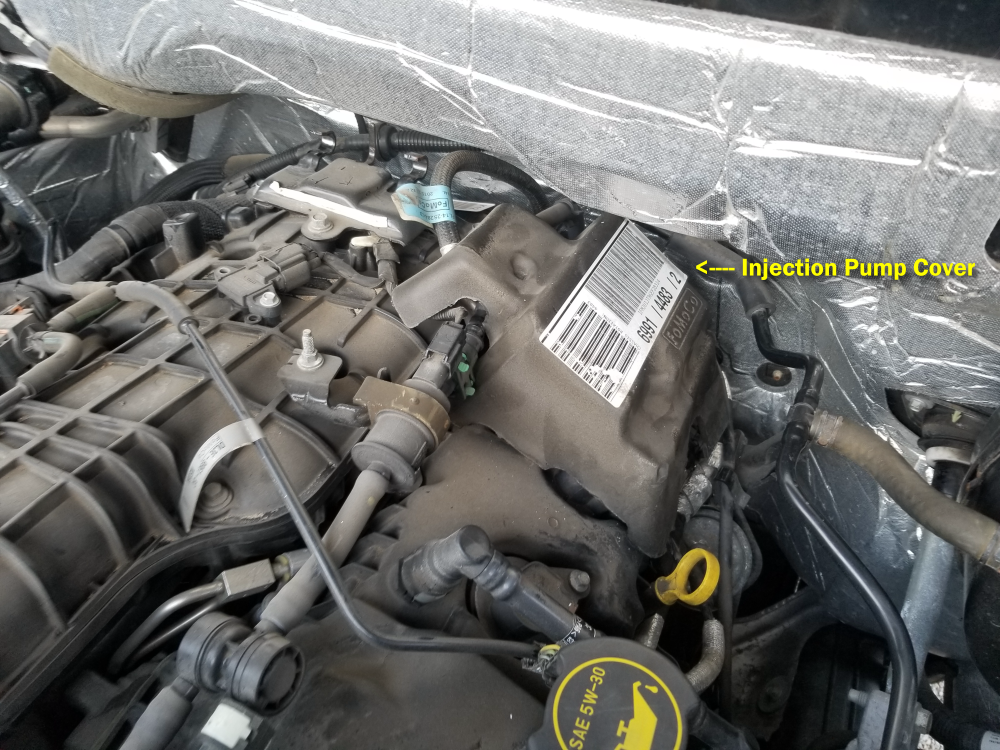
- Remove the insulated cover over the injection pump to get to spark plugs # 5, and #6.
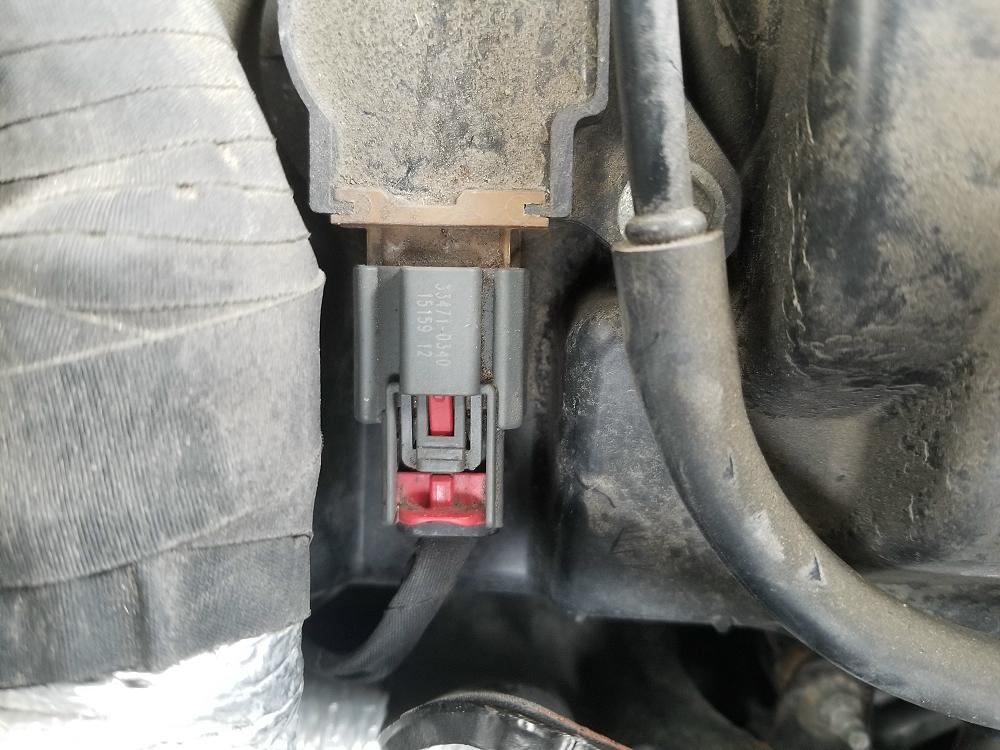
5. Remove the plug on the ignition coil of the cylinder you’re working on. There is a red locking tab on the plug:
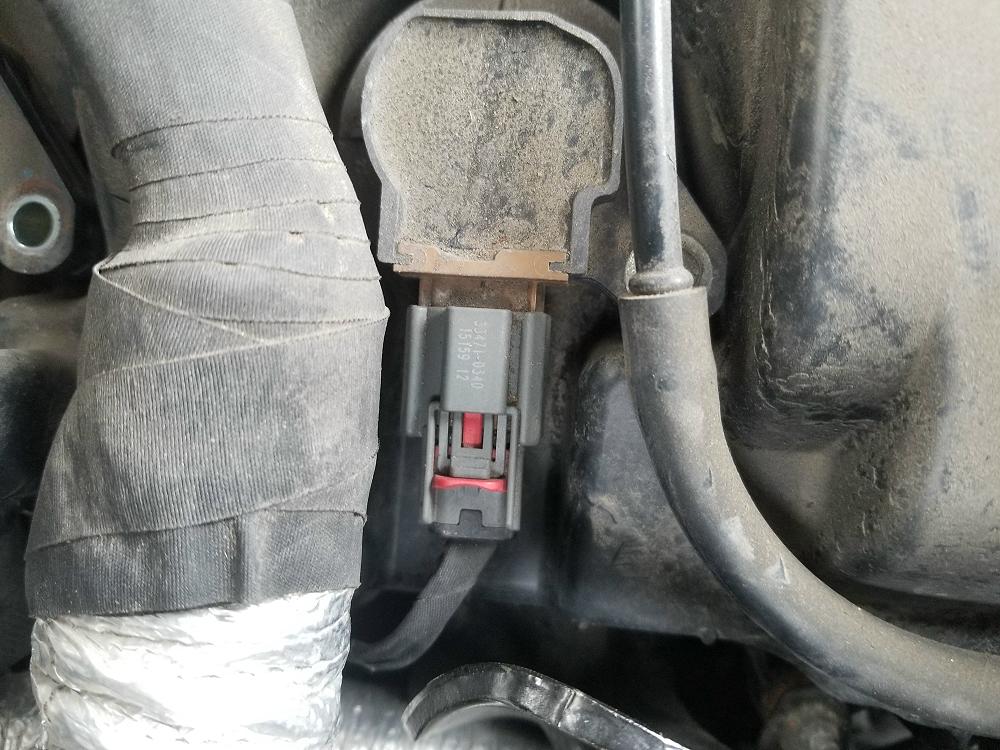
Slide the red tab back to unlock the plug. These are plastic components, so be careful that you don’t break them.
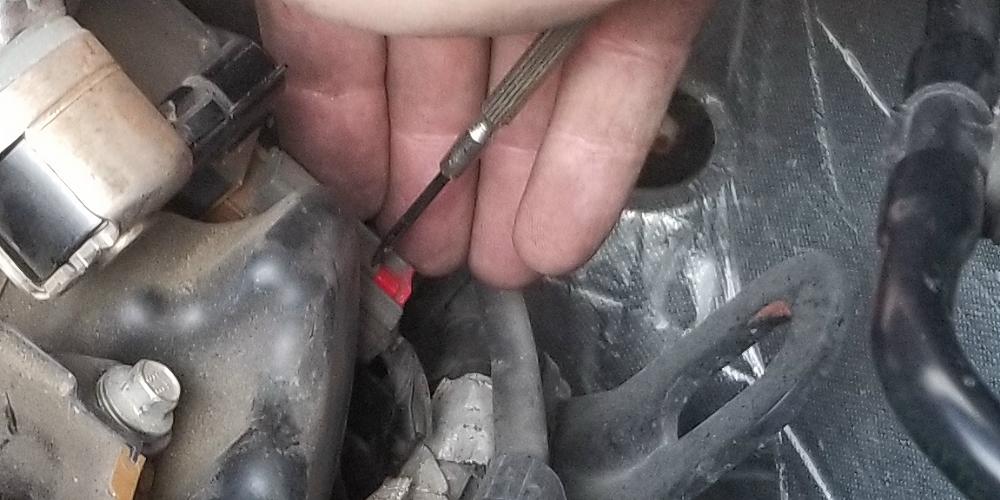
You’ll have to push down on the gray tab to get the plug to connect from the coil. I used a small screwdriver to press down on it as I slid the plug off. Again, be careful that you don’t apply to much force and break the plug.
6. Remove the bolt that holds the coil pack in place with a 8mm (5/16″) socket.
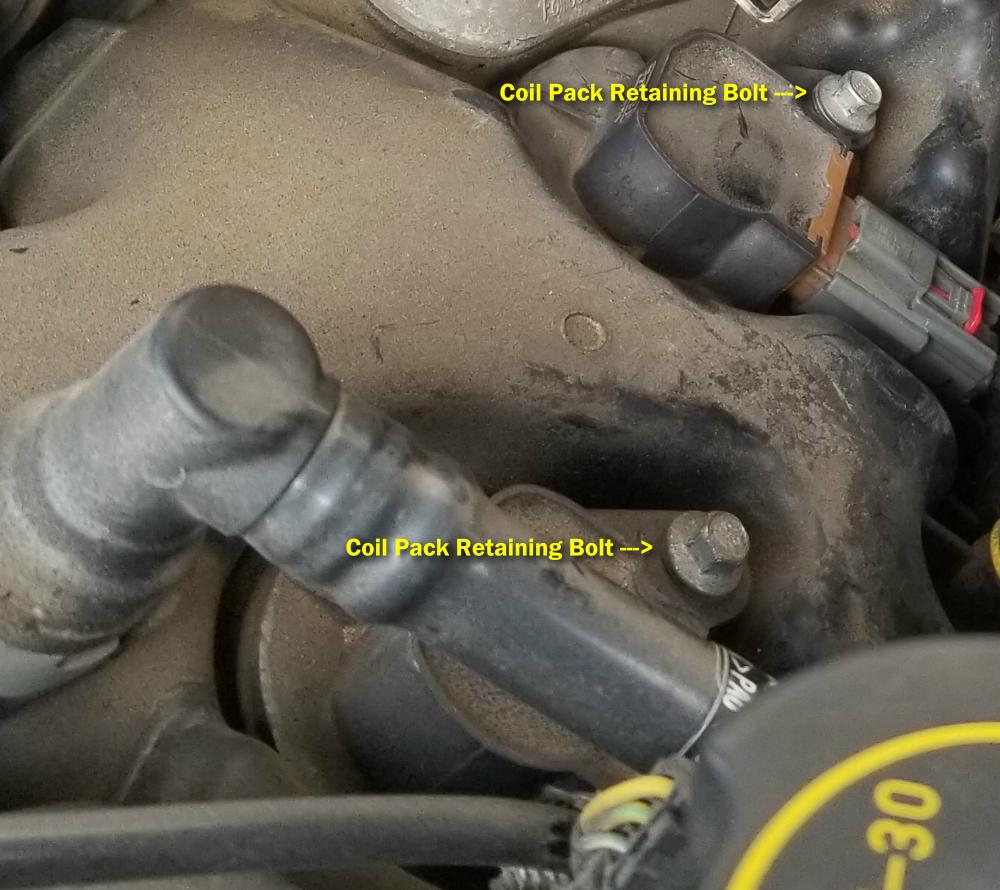
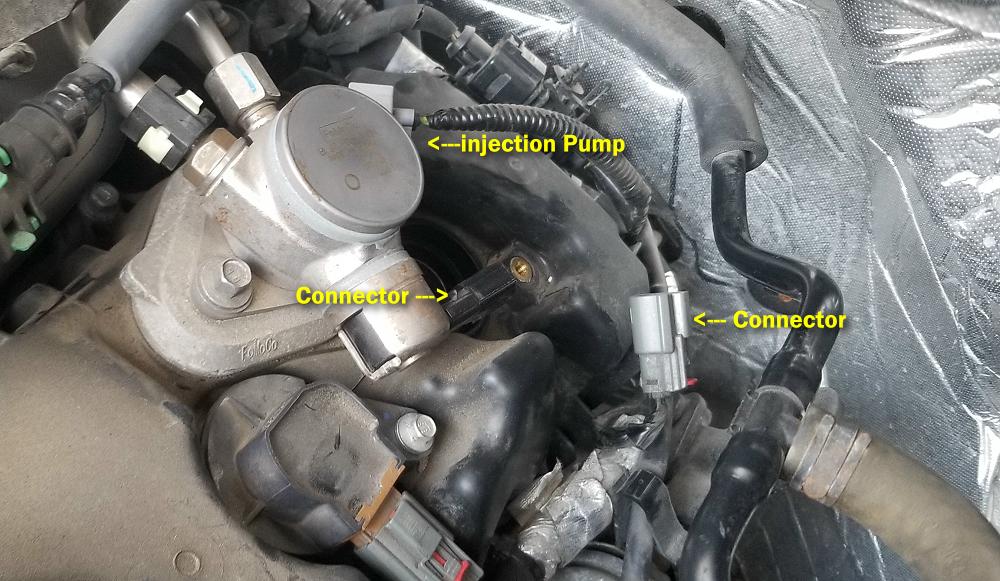
7. In order to get to the #5 and #6 spark plug, you’ll have to unplug the harness connector on the injection pump.
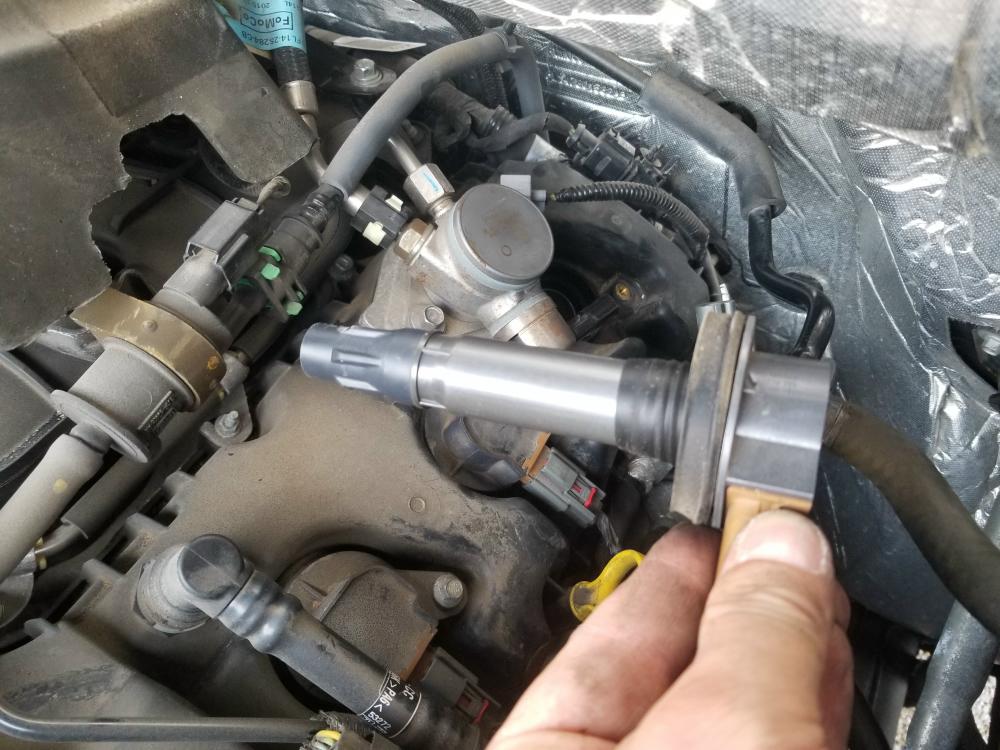
8. With the retaining the ignition coil plug unplugged and the retaining bolt removed, you can now pull the coil straight out of the hole. I used a flat blade screwdriver behind the coil to help wiggle it a little to get it out. It’s plastic, so you don’t want to pry on it or you may break it.
9. With the ignition coil out, you can remove the spark plug using a 5/8-inch spark plug socket, extension, and ratchet.
Examine The Spark Plugs:
Here is a look at (2) of the spark plugs that I removed.
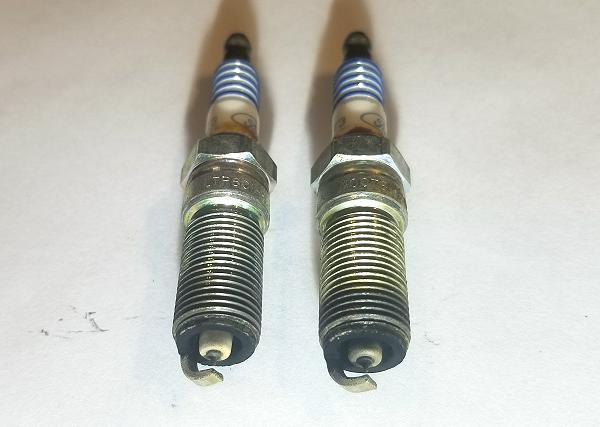
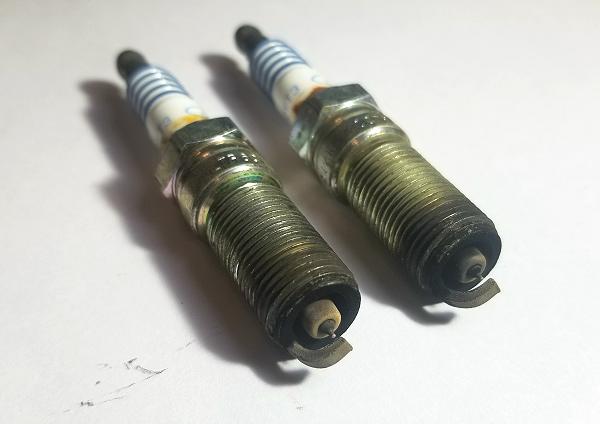
I did not find any evidence of carbon tracking on the plugs I removed. Carbon tracking is where the spark fires between the top of the plug and the base, across the ceramic shell. This leaves a characteristic carbon track on the insulator. It also causes the plug to misfire.
![]()
At this point I decided to just change the spark plugs. If I should get a misfire code again, than I’ll replace the ignition coil for whatever cylinder the code is for.
Install New Spark Plugs:
- Push a new spark plug into the spark plug socket.
- The socket should have a rubber insert or a strong magnet to securely hold the plug in place.
- Carefully lower the new spark plug down into the well.
- Spin in the spark plug a few turns by hand in the clockwise direction to prevent it from becoming cross threaded.
- Tighten the plug in the clockwise direction with the 3/8″ drive ratchet to just past hand tight.
- If you are installing brand new plugs, tighten them until you feel the new crush washer collapse.
- Avoid over tightening the new spark plugs to prevent from stripping the aluminum threads.
- Some mechanics prefer to use anti-seize lubricant grease on the threads, but most spark plug manufacturers do not recommend using anti-seize since it can easily lead to over tightening. Double check that the spark plugs are tight before moving on to the next steps.
- Apply some dielectric grease to the opening in the rubber dust boot at the bottom of the ignition coil. The dielectric grease will help seal out any moisture, dust or debris and ensure a reliable electrical connection.
- Lower the ignition coil back down into the well and push it on to the top of the new spark plug.
- Rotate the ignition coil back and forth a few times to help spread the dielectric grease.
- Line up the bolt hole in the ignition coil assembly with the corresponding hole in the top of the engine.
- Reinstall the ignition coils retaining bolt by hand in the clockwise direction to prevent it from becoming cross threaded.
- Tighten the bolt in the clockwise direction with the 8mm socket and a 1/4″ drive ratchet until it is snug. <>Avoid over tightening the bolt to prevent from cracking the plastic ignition coil housing.
- Slide the electrical connector straight back into the socket until it “clicks” securely into place.
- Push in the red plastic lock tab to secure the power plug.
- Start the engine and listen closely for any strange sounds that might indicate a problem such as a loose spark plug or a disconnected electrical connector.
- Reinstall the injection pump cover, the engine cover, and the oil cap.
Results:
I’ve been driving the Expedition for a month now with the new plugs, and haven’t received a misfire code. If I do, I’ll update this page.