

One of the most popular swaps going these days is underpinning various classic trucks with the front suspension off of the venerable Ford Crown Victoria, including the 1967-1972 Ford F-100.
Thanks to the shared 34-inch framerail spacing, the Crown Vic assembly is easily adapted to the 1967 Ford F-100 and is an affordable alternative for those on a tight budget. Swapping to a Crown Vic frontend nets the project vehicle coilover shocks, 12-inch vented disc brakes with twin-piston calipers, sway bar, rack-and-pinion steering, better handling than what could have ever been imagined with the old twin I-beam suspension, and an approximately 4- to 5-inch drop. Best of all, the whole hub-to-hub assembly unbolts from the donor vehicle with just 10 bolts and all of the serviceable parts are readily available at any auto parts store.
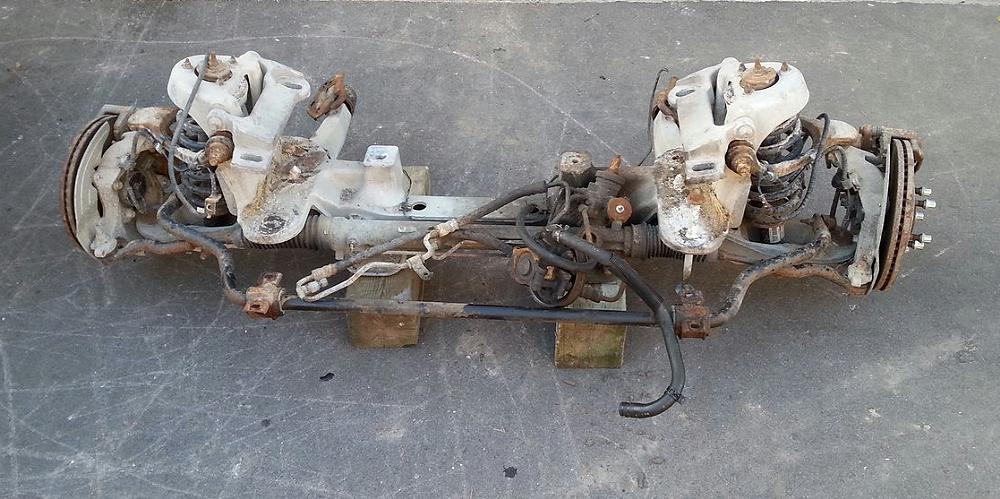
Donor Vehicle
Donor cars with the correct suspension for this swap are the 2003-2009 Crown Vics, Mercury Grand Marquis, and Lincoln Town Cars, as well as 2003-2011 P71s (Police Interceptors) and can be had for around $400-$750, depending on condition and location. Prices have been steadily going up over the past couple years, however, finding one has never been easier, as sellers have popped up on eBay who specialize in finding good assemblies and sometimes even include shipping. Local junkyards and Craigslist are other places where these can be sourced, but watch out for ones that came off of cars that have been driven hard and put away wet, as the beefy aluminum crossmember can develop stress cracks. Also shy away from any donor cars that were in a frontend collision. If you decide to go looking on your own, make sure the seller includes the entire hub-to-hub assembly, all 10 mounting bolts, uncut brake lines, calipers, discs, sway bar and bolts, and the rack with all of its lines, also uncut.
Keep in mind that while pre-’03 Crown Vics have a similar body style, the suspension is different and won’t work. Also shy away from high-mileage PIs and taxis that are more likely to have served a much tougher life. If you have to have a PI with the stiffer spring rate, find one that served as the Chief or Watch Commander’s car. Keeping in mind that that these are used components, your best bet, as always, is with a relatively low-mileage car. In fact, the frontend for this swap came off of a Mercury Grand Marquis that had less than 100K miles on the clock, driven by a little old man in Arizona. Perfect.
Wheels & Bolt Patterns
Once you locate a good assembly, the next problem that will have to be solved is in regards to wheels and stance. The Crown Victoria setup is several inches wider from hub-to-hub over a stock F-100 with I-beams, but because of the big wheelwells, the trucks can swallow up the extra width easily with the right wheel and tire package. We’ve seen everything from stock Mustang wheels to custom, one-off rims filling the fenders. Purists should note that the larger brakes limit the smallest wheel diameter to 16 inches. Also keep in mind that the Crown Vic has a 5×4.5 bolt-pattern, while the Bumpsides came stock with a 5×5.5-inch bolt pattern. Solutions range from 5×5.5 to 5×4.5 wheel adapters on the rear to keep the wheels the same, redrilling the rear axles and drums for 5×4.5, installing the wider ’80-’83 F-100 9-inch with the 5×4.5 pattern, using an Explorer 8.8-inch axle (narrower than the too-wide Crown Vic 8.8), or having a custom axle made.
Procedure
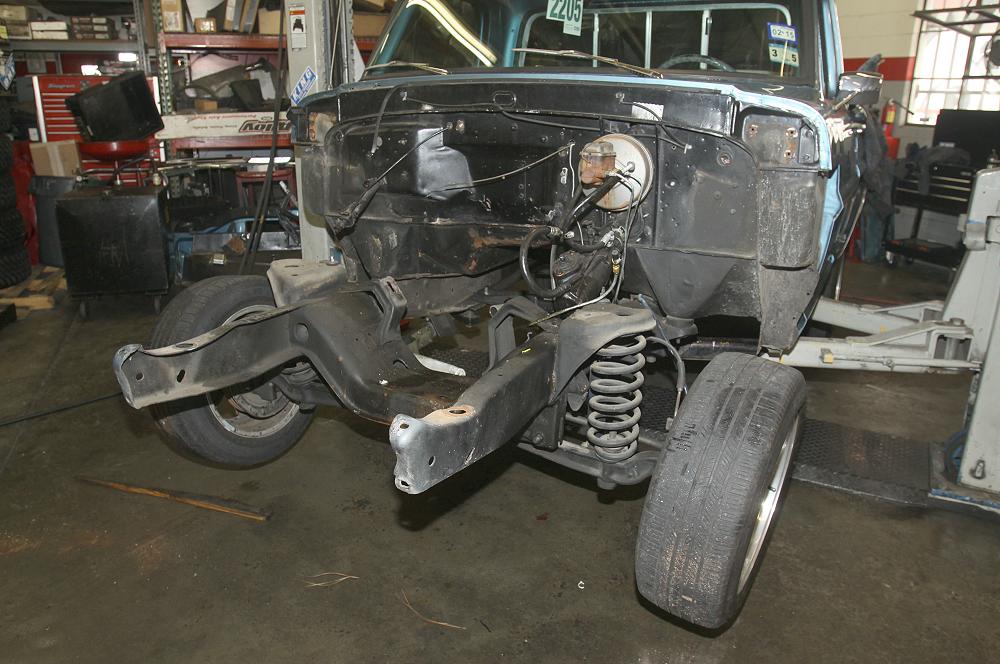
The first order of business was to strip the truck of its tired 351 and the entire front clip. While it isn’t necessary to take your truck down to this level of disassembly, it certainly makes the modification much easier.

With the frame exposed, we noticed a crack where the steering box mounts—a fairly common problem on this vintage of Ford trucks.
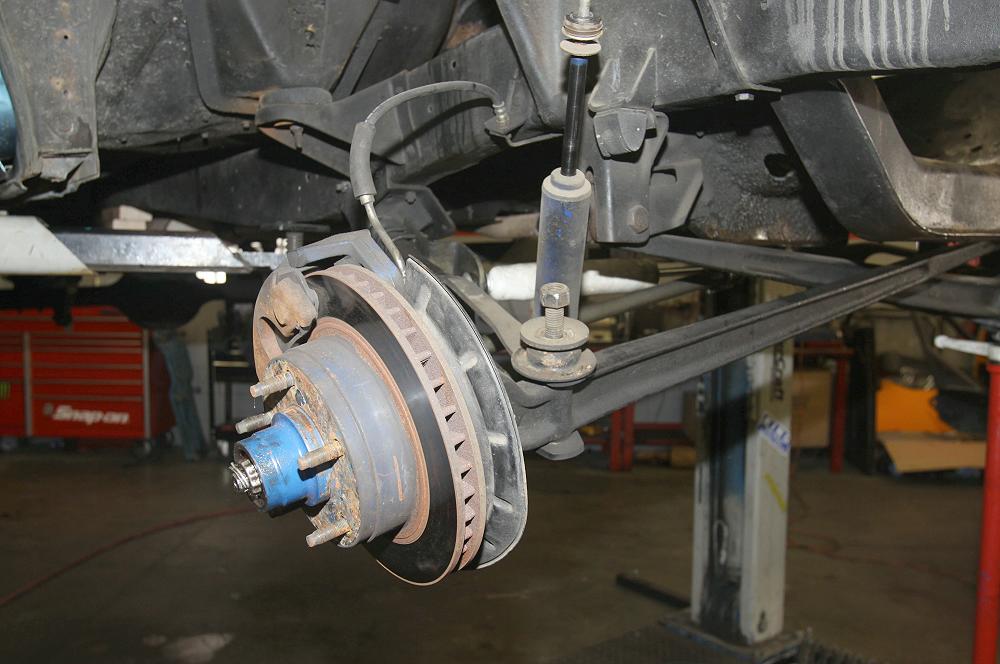
Next it was time to say goodbye to our twin I-beam suspension. Our truck had been upgraded with discs at one point, and we were able to sell our front suspension to offset the cost of the Crown Vic assembly. Prior to removal, be sure to mark the centerline of your hubs on the frame. This will be your reference point for placement of the new suspension.
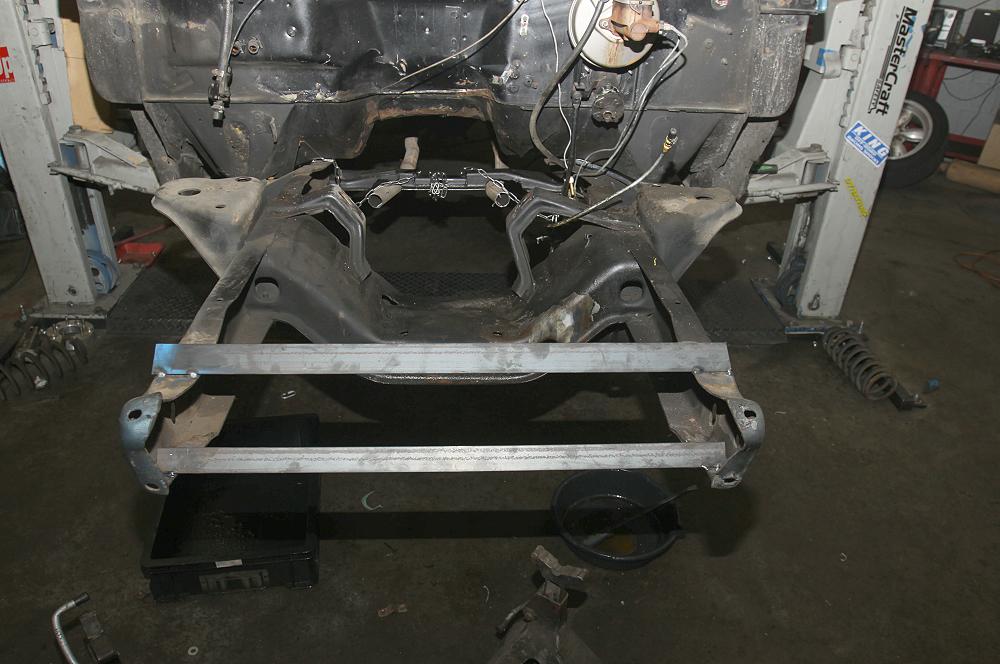
Before we could start removing the massive factory crossmember, we tack-welded some angle iron to the front of the frame to keep the rails from square.
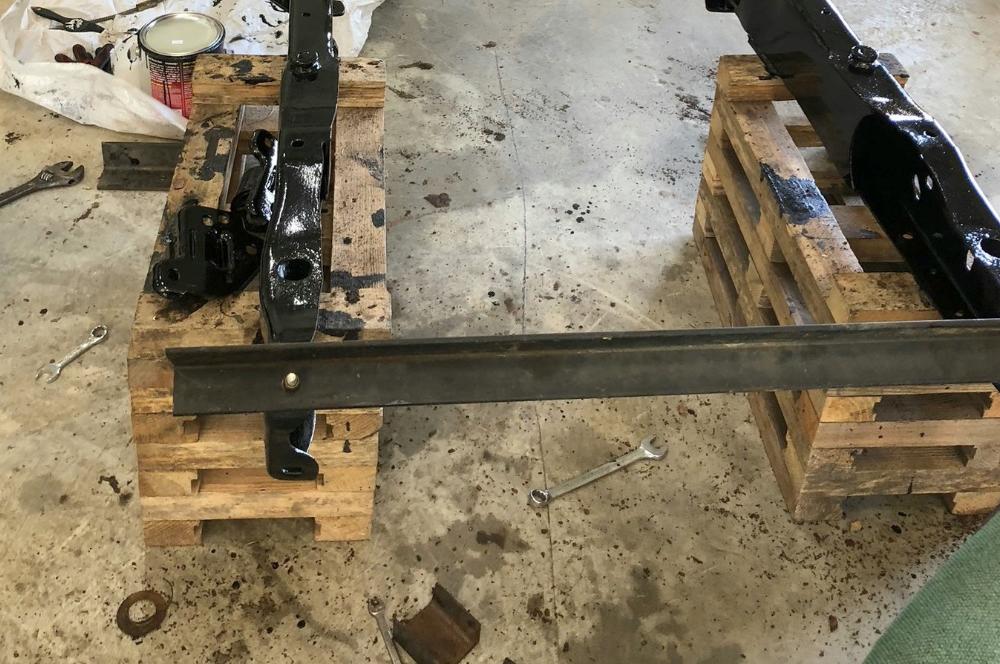
You might also accomplish this by bolting some steel angle across the frame horn using the holes for the front bumper.
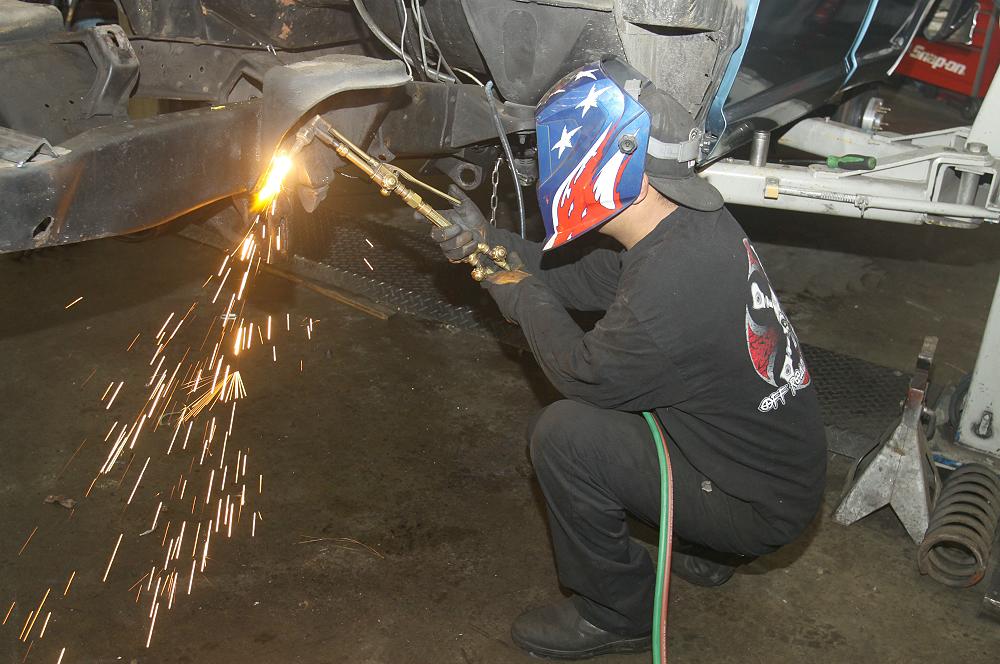
One of the most time-consuming parts of the process was torching, grinding, or drilling (your choice) the rivets holding the crossmember and coil buckets in place.
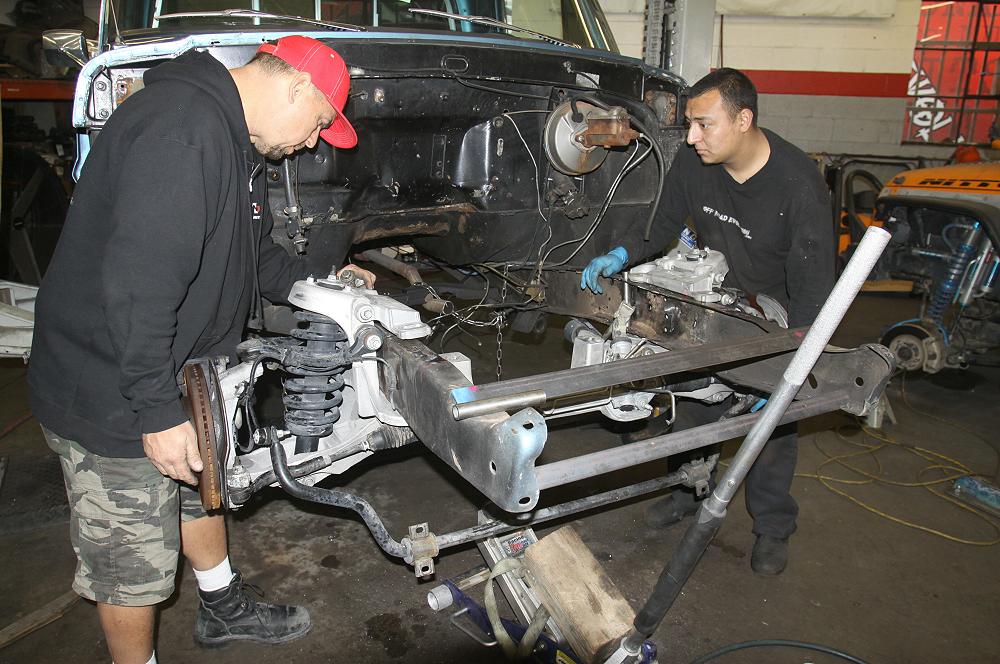
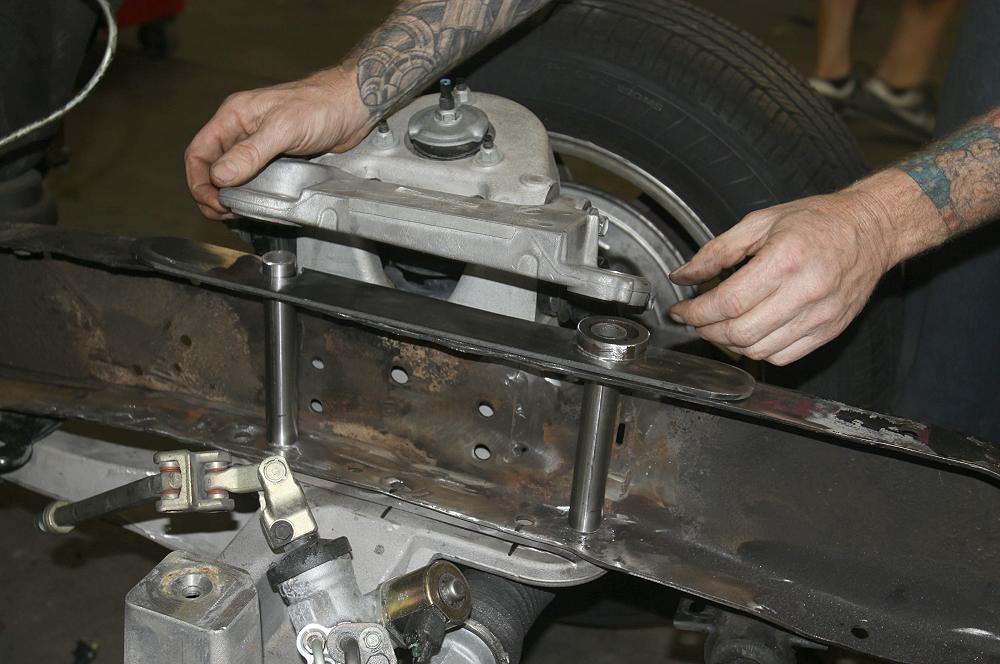
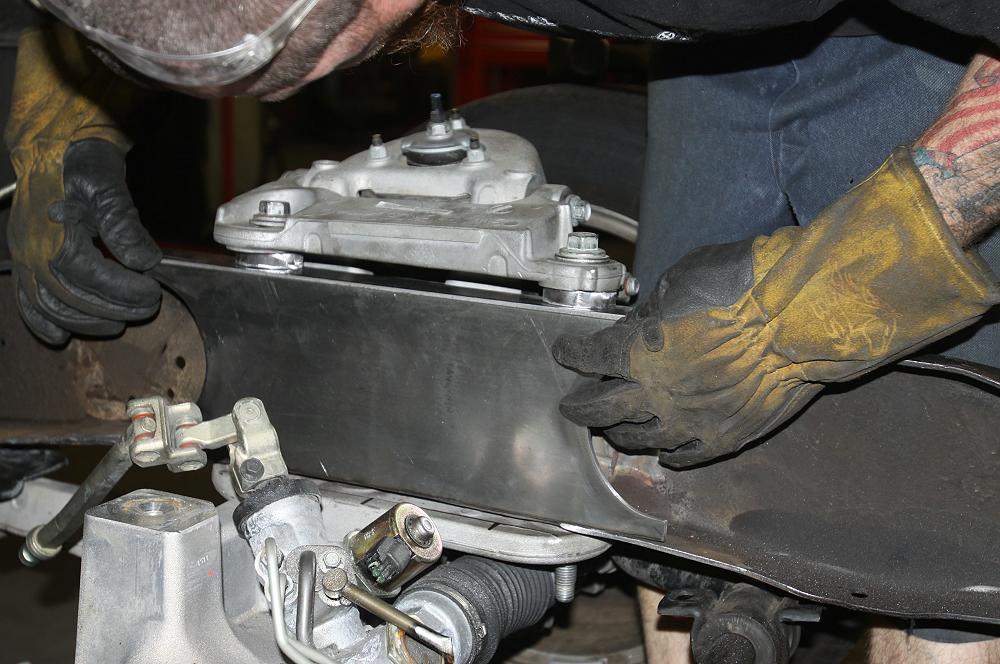
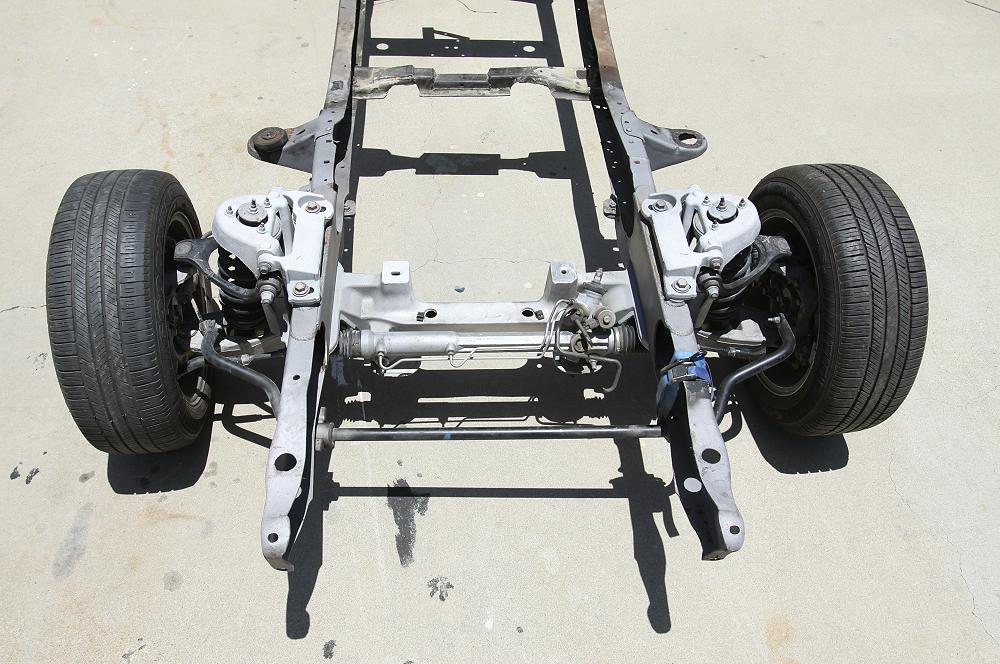
After removing the coil bucket and crossmember, we test-fitted the new front end. There are diagrams available online for where the new crossmember should be placed, but you are in good shape if you keep the centerline of the new suspension inline with the stock hubs. For those who want to make a slight wheelbase change to clear larger wheels, this is the step where that must be decided.
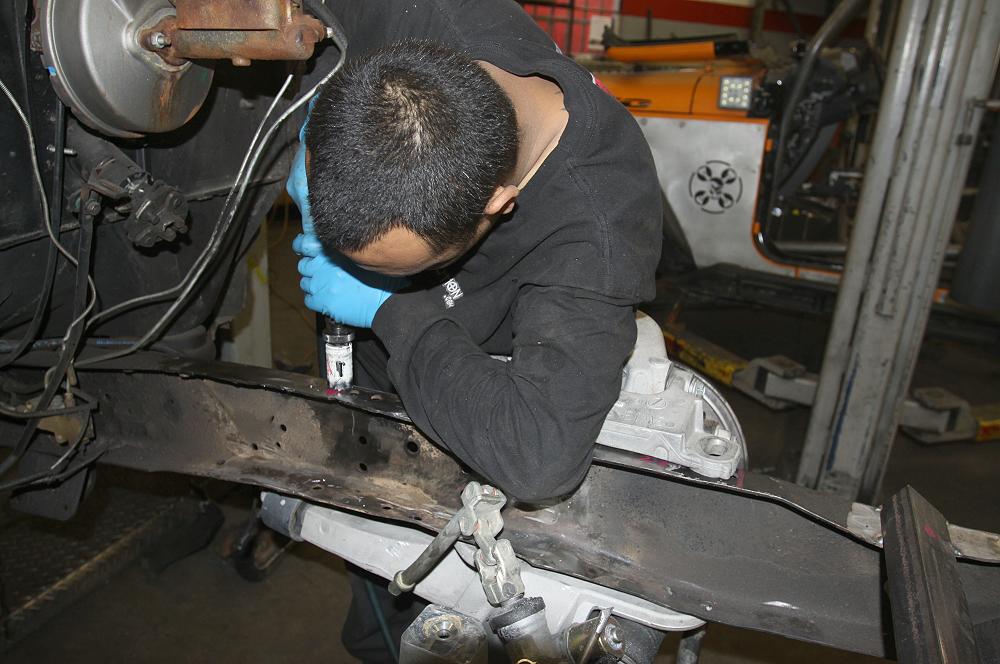
With placement, checked, measure, and double-checked, we drilled the four mounting holes in the frame.
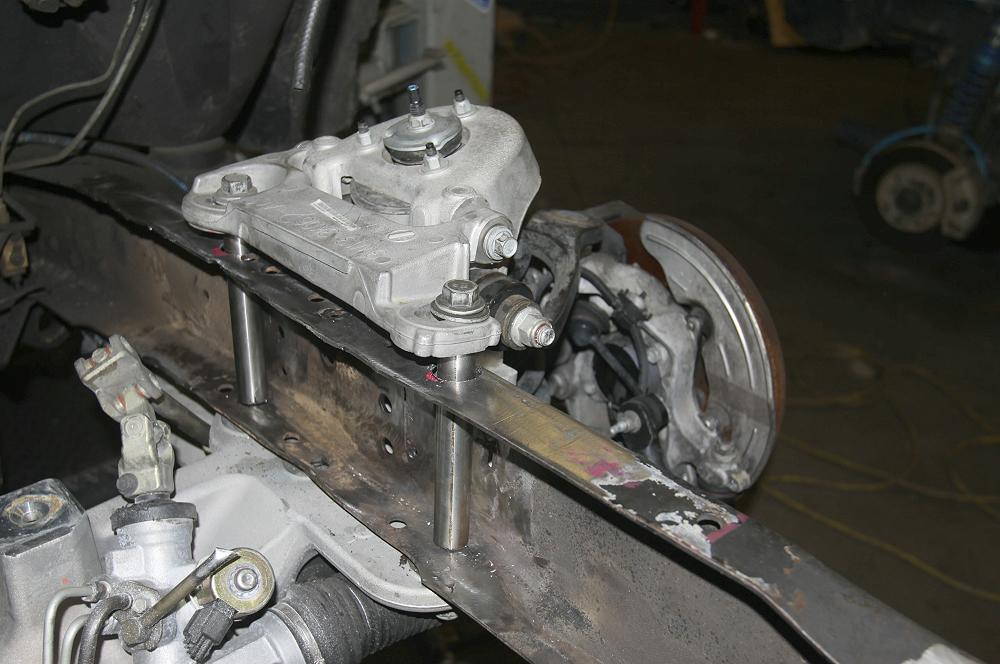
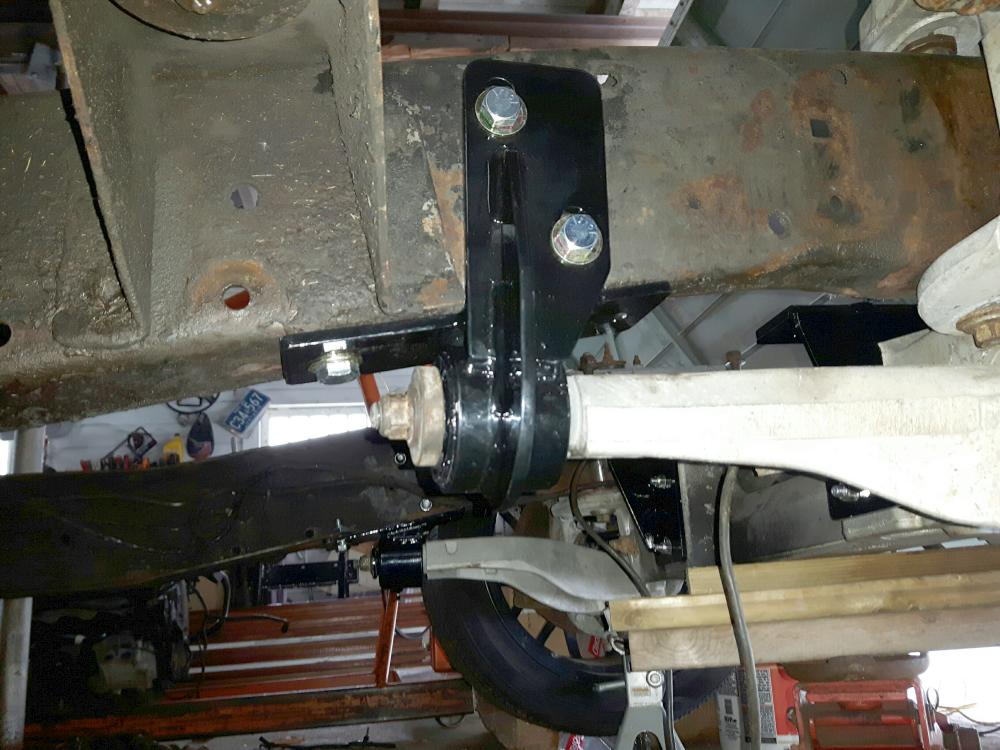
In this photo, you can see that while the F-100 frame width is correct for the Crown Vic assembly, the F-100 frame is actually too short. To properly support the new suspension, we cut bolt sleeves to match the height of the Crown Vic’s crossmember brackets.
After all four holes were drilled and sleeved, we tightened the bolts and lowered the truck down, where it rested on the new suspension for the first time.
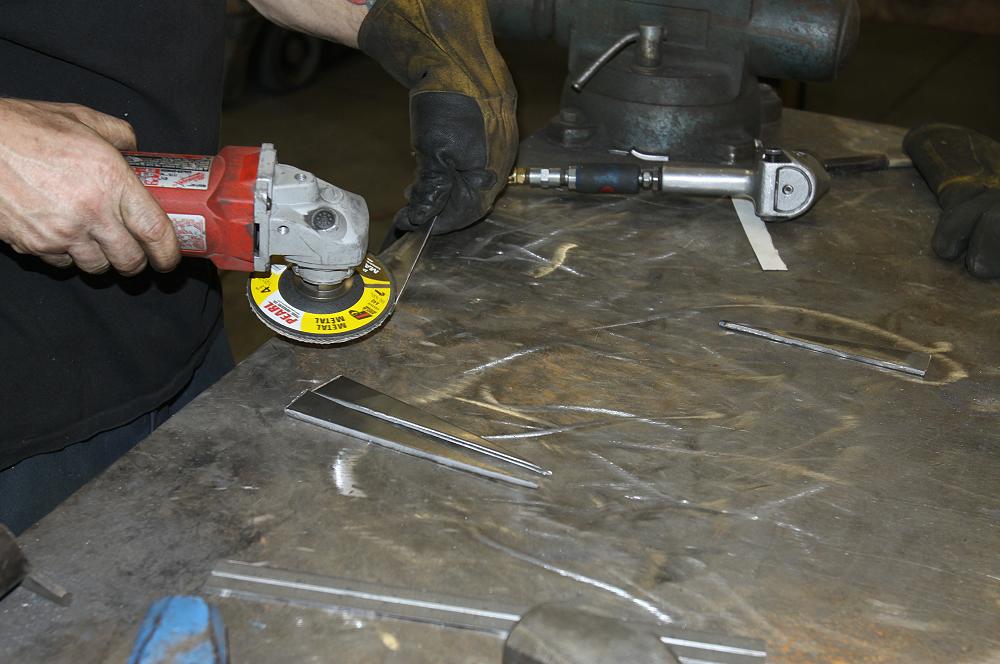
To strengthen this section of frame to better match what is necessary for the IFS to work properly, stiffening plates were fabricated out of 3/16-inch steel plate. The rounded ends help to spread the load and decrease the chances of frame cracks forming from stress.
We also fabricated spacers to take up the remaining space between the top of the F-100 frame and Crown Vic upper mounting bracket.
The last order of business was to create a 3/16-inch plate to box the frame. Notice the fish-mouth cuts on the end of the plates to allow the frame the ability to flex without causing a stress crack.
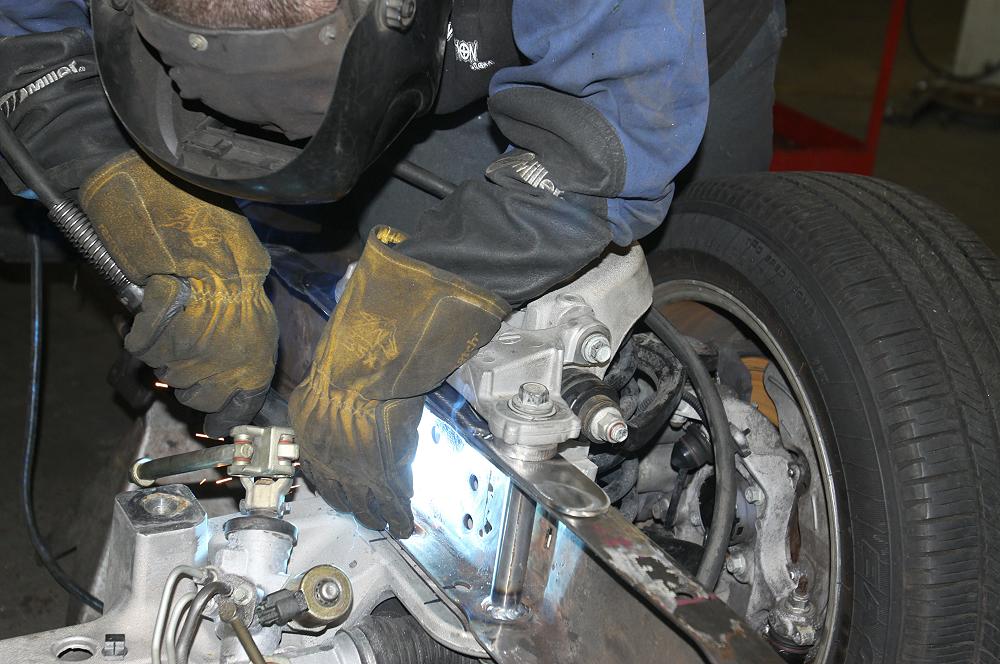
Once all of the metal pieces for the crossmember were fabricated, it was time to start burning some metal. You can see the bolt sleeves being welded here.
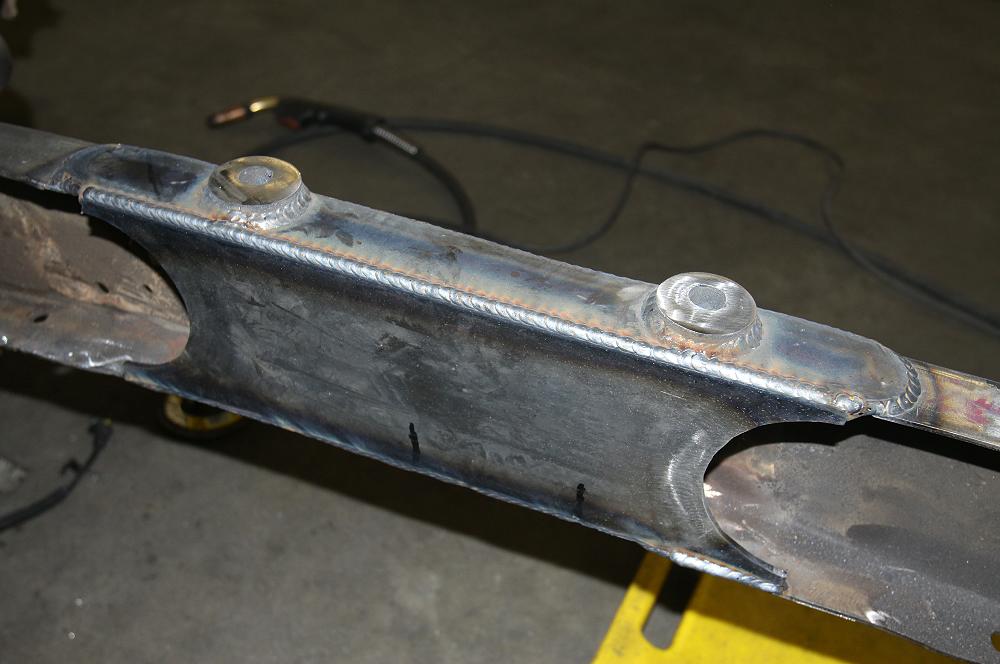
This is the final result after welding the new plates to the frame. We also filled in the spacers, giving a nice, even mounting surface for the Crown Vic crossmember bracket.
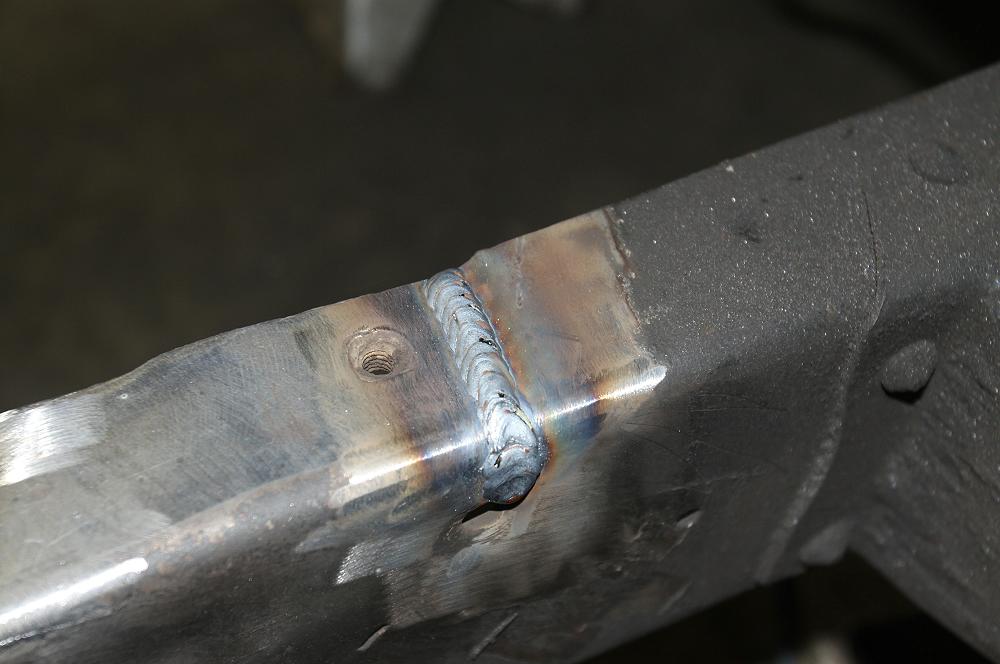
While we were at it, the frame crack was also repaired with some grinding and a quick weld.
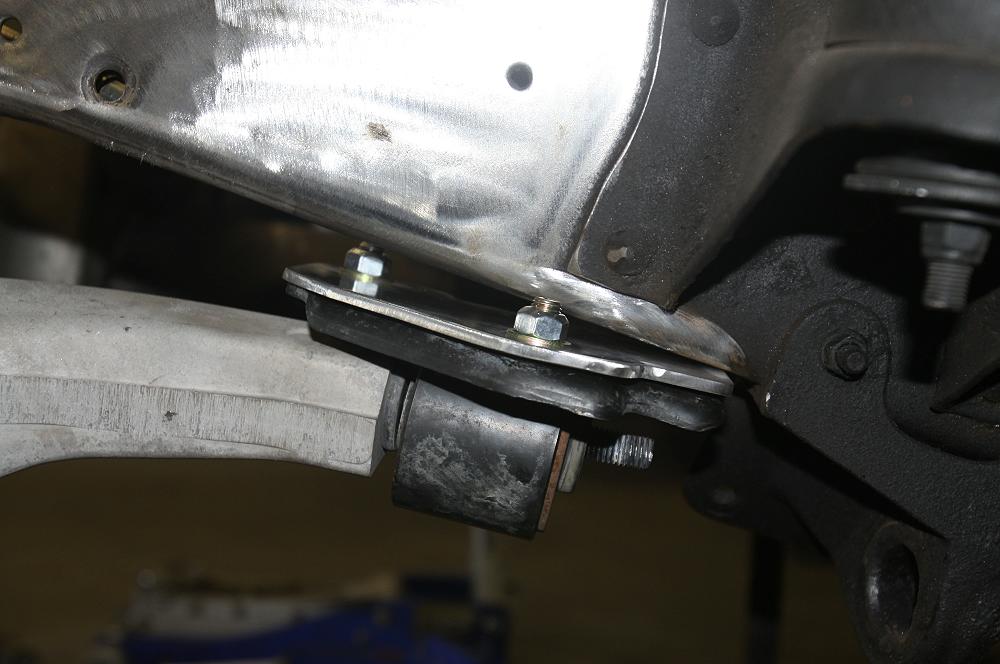
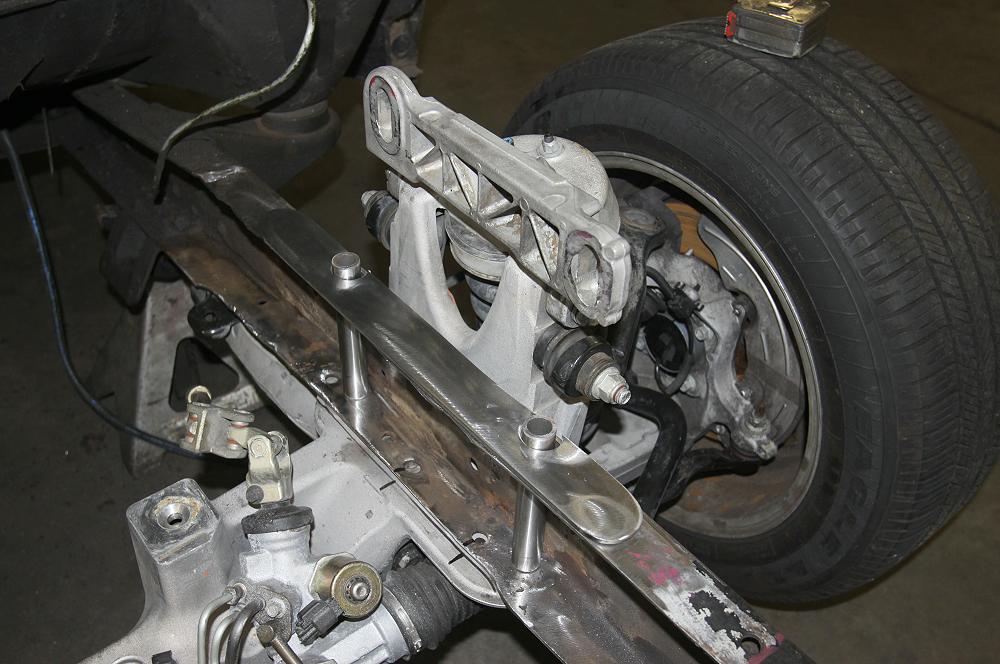
The final piece of the conversion requires mounting the Crown Vic’s lower control arms to the F-100 frame. As you can see here, the frame curves to the right where the lower control arms need to mount.
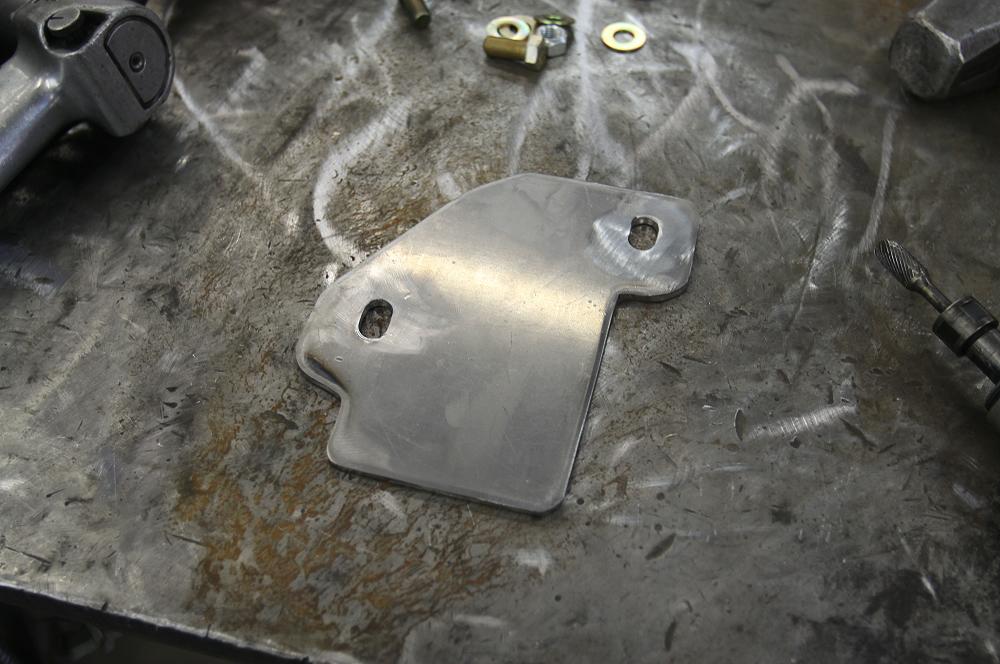
Using the Crown Vic lower control arm bracket as a template, we fabbed up these mounting plates.
To finish our bracket, we created these pieces to fill the curve of the frame and welded them to our mounting plate.

After welding the brackets to the frame, we mounted the lower control arms to their new homes, completing our Crown Vic frontend conversion.
I’ve also seen custom control arm mounts built like this (above and below).
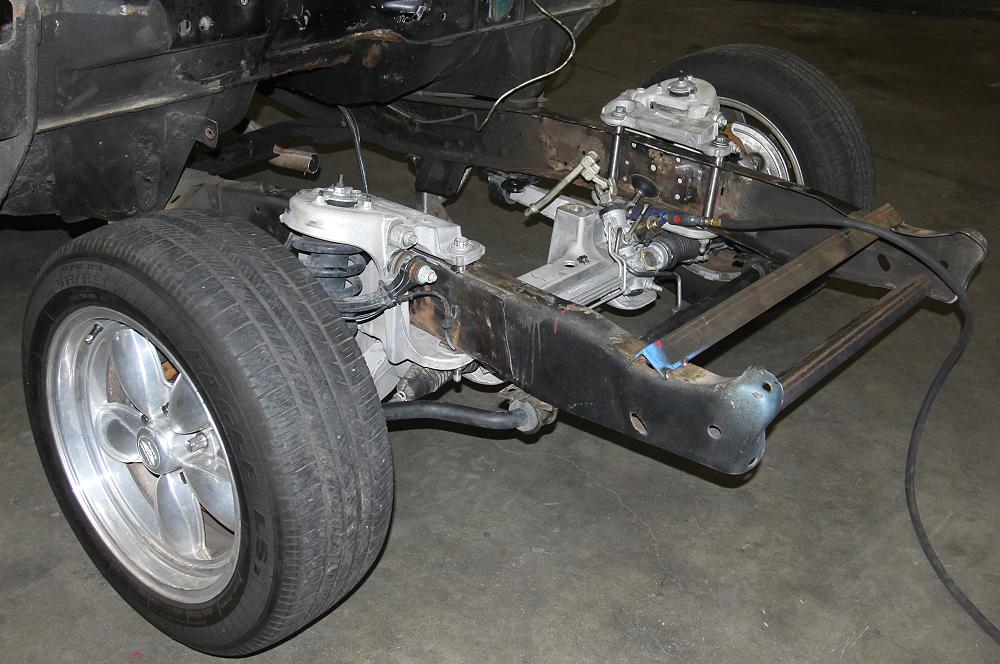
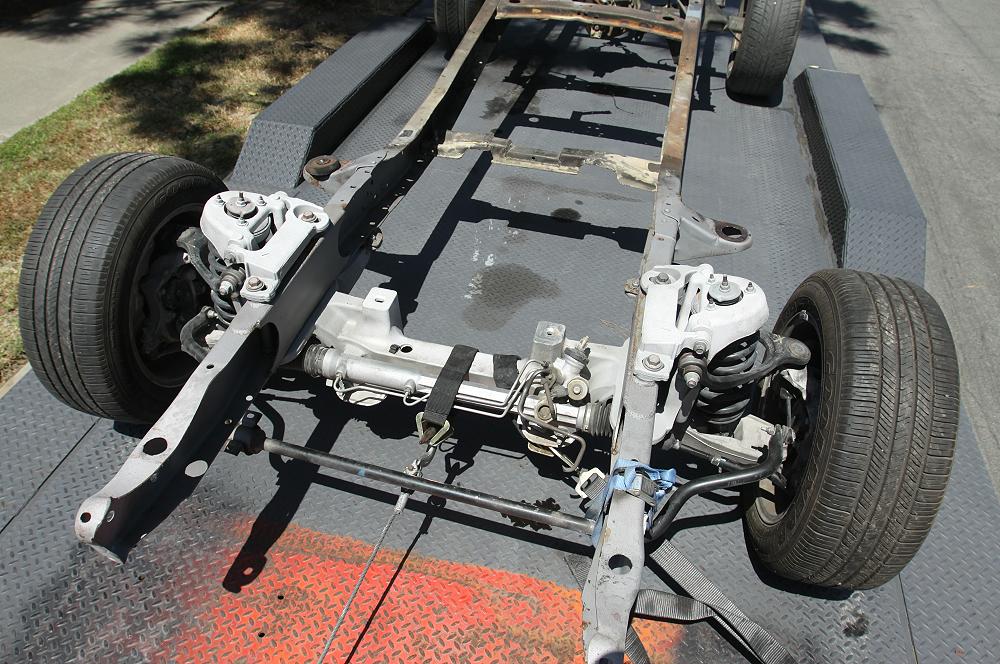
With the new crossmember in place, we removed our angle iron braces. The end result is a 48-year-old chassis with a modern IFS front suspension setup.
Finished
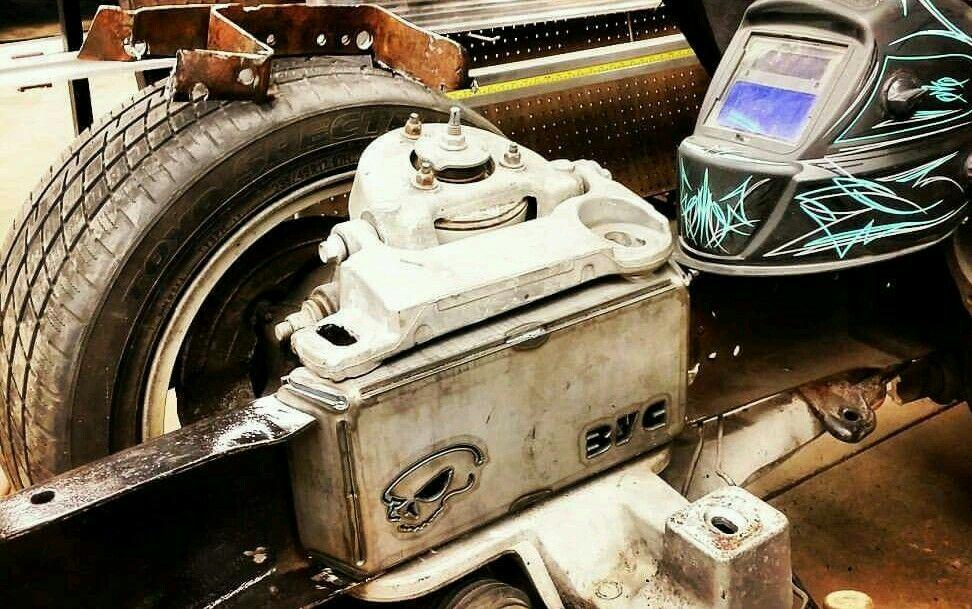
Using An Installation Kit
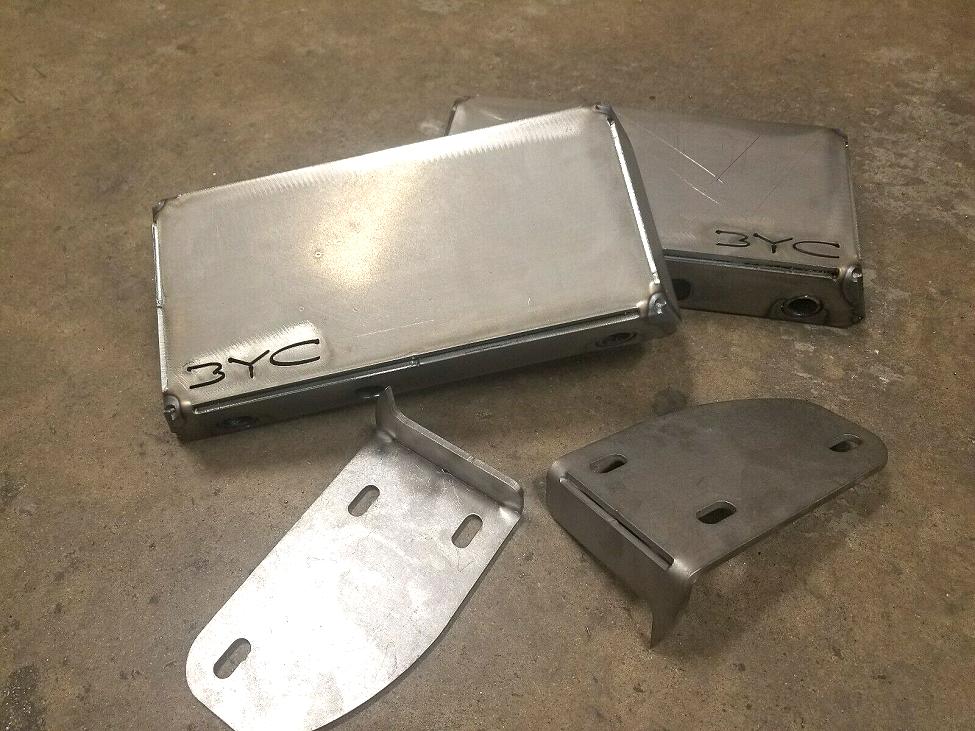
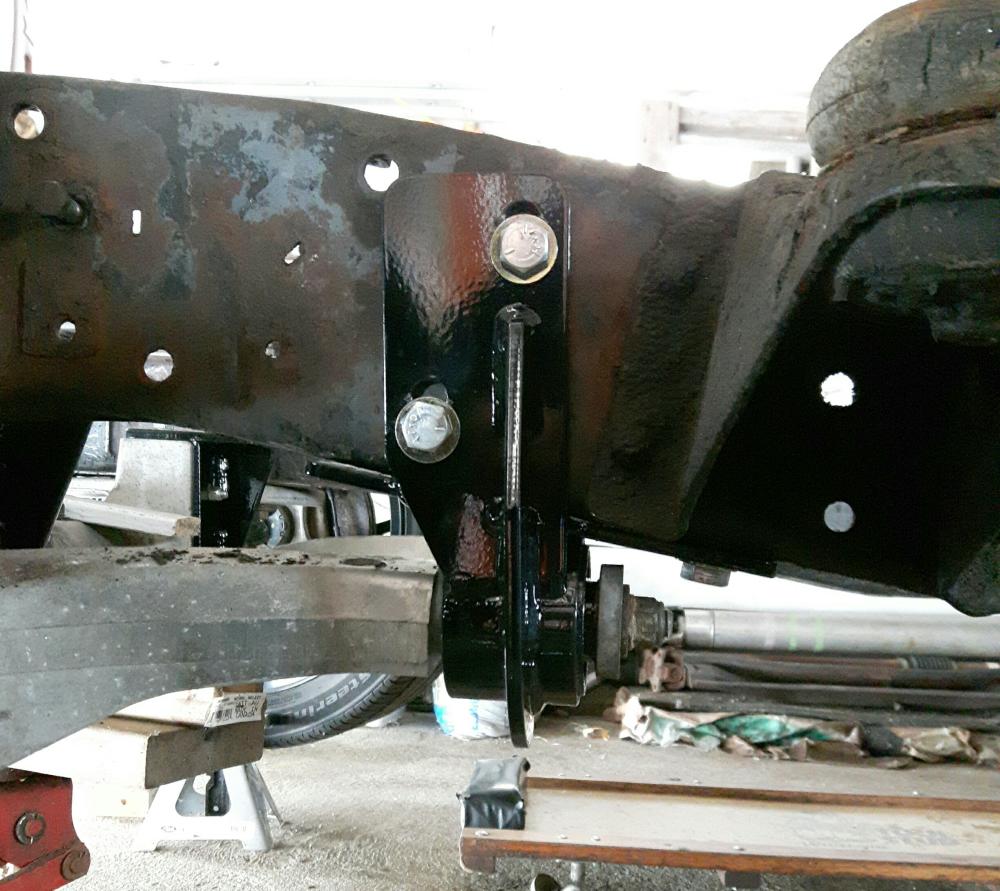
Backyard Customz (ebay) offers an installation kit to help make installing the Crown Vic front suspension in to a F-100 easier.
These brackets have been designed for dropping in a 2003+ Ford Crown Victoria front suspension into your F-100 pickup. They are a set left and right. They are CNC cut out of 3/16″ mild steel, and have 1″ .120 wall tube for the (4) main mounting bolts to go through as well as the alignment pin hole on the bottom tab.
They come bent and tacked and need to be fully welded to your liking. The lower control arm mounts are included as well.
It really takes the guess work out of doing this swap. Simply remove the front suspension and crossmembers, measure out and drill your alignment pin holes through the bottom of the frame. After that Jack up the new Crown Vic suspension and then make the cuts on the top of the frame and slide these brackets in and bolt it together. After that you then fully weld the seams up and weld the bracket to the frame.
Resources
1967 Ford F-100 – Project Speed Bump: Part 2