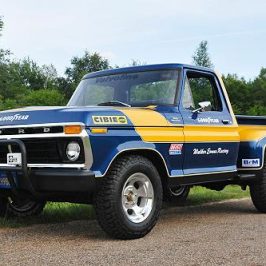
Every year, 4-Wheeler & Off-Road Magazine hosts an ‘Ultimate Adventure’, and each year they build an official vehicle to load it. I thought it would be interesting to take a look back at the 2011 Ford F-150 EcoBoost 4×4 that they built to lead the 2011 Ultimate Adventure. The Ultimate Adventure is a week long off-road trip they take each summer with sponsors, cronies, and select invited readers.
The magazine started out by touring the F-150 truck plant in Michigan. They then took their new Blue Flame Ford F-150, and drove it cross-country to Randy Ellis Design in Phoenix Arizona to start its transformation from America’s Best Selling Pickup, to a pickup ready for wheeling anywhere in America.
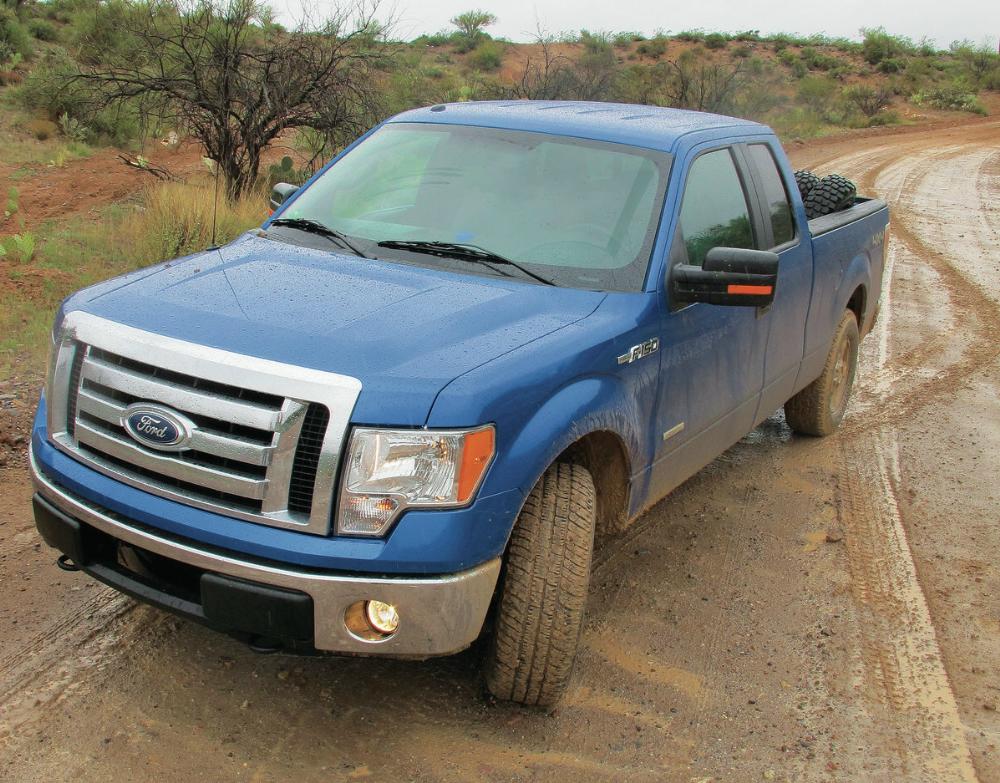
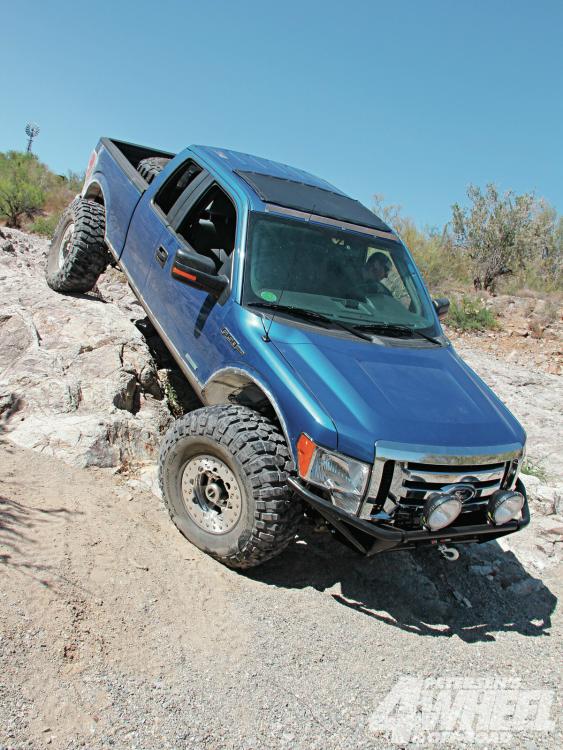
(Stock Blue Flame 2011 Ford F-150 EcoBoost 4×4)
The goals are simple for the EcoBoost truck: big tires, front and rear lockers, a rollcage, a Warn winch up front, storage for the general wheeling junk they always take,and hopefully never opening the tool bag the whole trip.
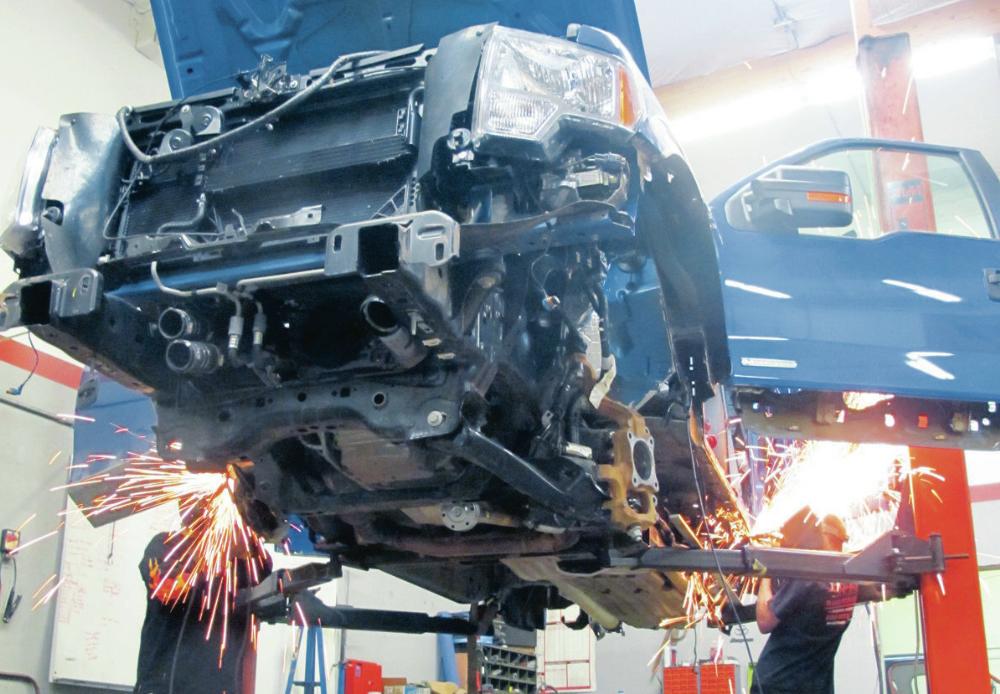
The truck was put on a lift, and disassembly and construction began. The suspension was disassembled, and the intercooler for the EcoBoost’s twin turbos was removed.
Front Axle / Suspension
The independent front suspension that Randy Ellis Design built for the F-150 was entirely custom. Every component was built to spec, from the TIG-welded chromoly A-arms and knuckles to the Dynatrac Pro-Rock 60 front housing and RCV axleshafts and CV joints.
The Dynatrac Pro-Rock 60 uses a high-pinion 5.38 gearset, an ARB Air Locker, and custom RCV axleshafts made of 300M, a steel alloy heat-treated for strength. The driver-side axleshaft is very short, but was machined from a solid chunk of 300M.
The long side axleshaft is also alloy steel from RCV, but made from two parts where the CV flange is pressed and TIG-welded to the axleshaft. Each axleshaft is held into the housing by a pressed bearing and retainer. The housing is then bolted into the frame of the F-150 with three mounting points.
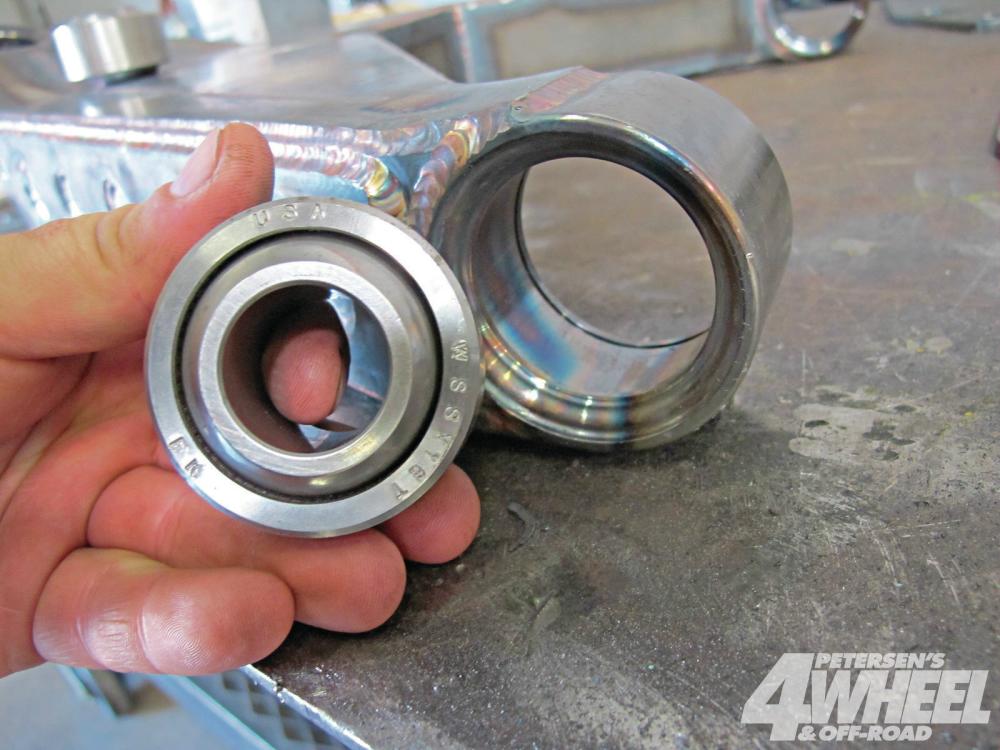
The A-arms use massive spherical bearings that were sourced through Poly Performance. These are the same units used in Trophy Truck desert race vehicles and should be more than adequate for the abuse our truck will see. The cup of the bearing is welded to the A-arm and then the bearing pressed in. Poly Performance also supplied the rod ends and threaded bungs used in the upper A-arm and the steering tie rods as well as the limiting straps.
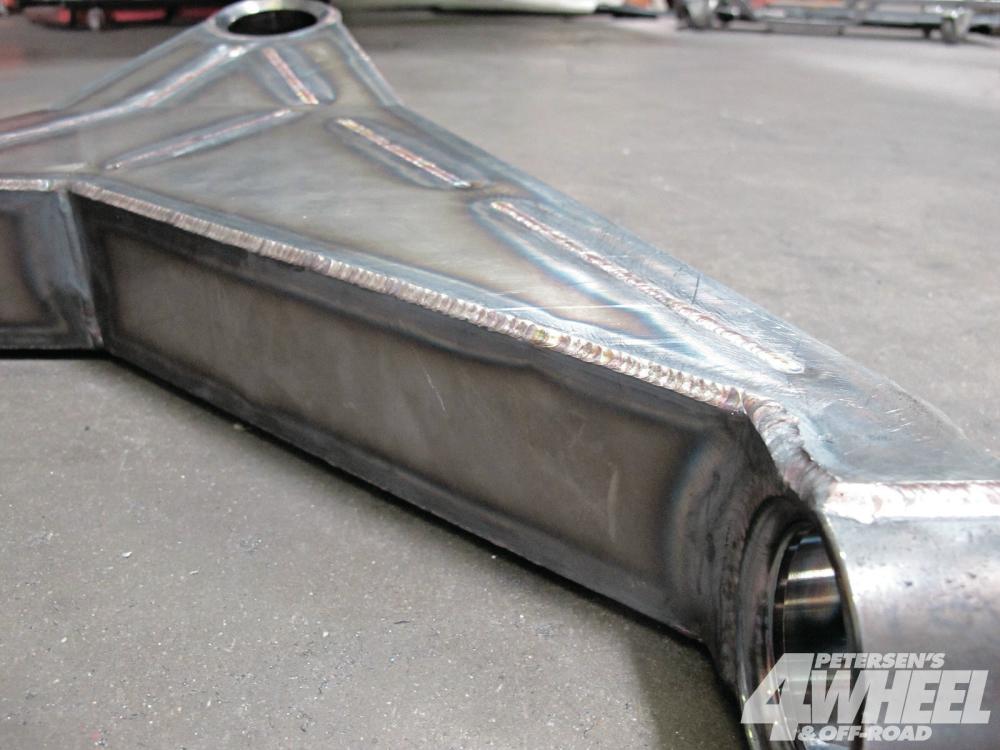
The A-arms and knuckles are made of various thickness of chromoly steel from Competitive Metals and have inner structures for strength. The welding of these parts was mostly TIG and took 14 hours.
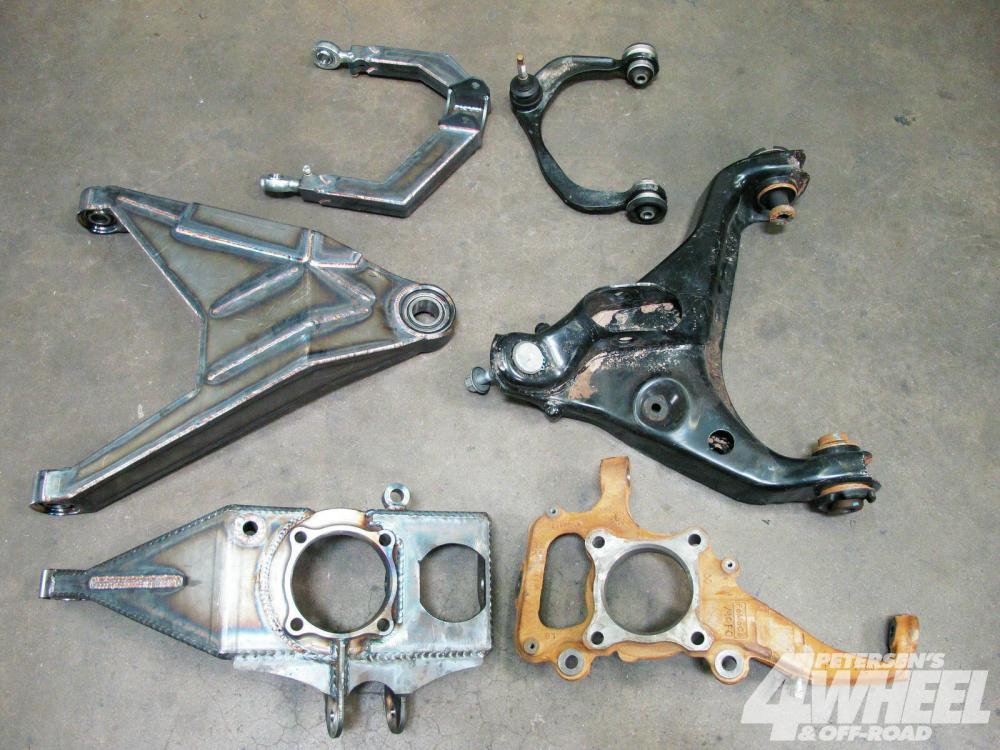
The new components built by Randy Ellis Design (left) are massive compared to the stock pieces (right). The new parts are wider than the original arms, resulting in more wheel travel and a wider, more stable track width.
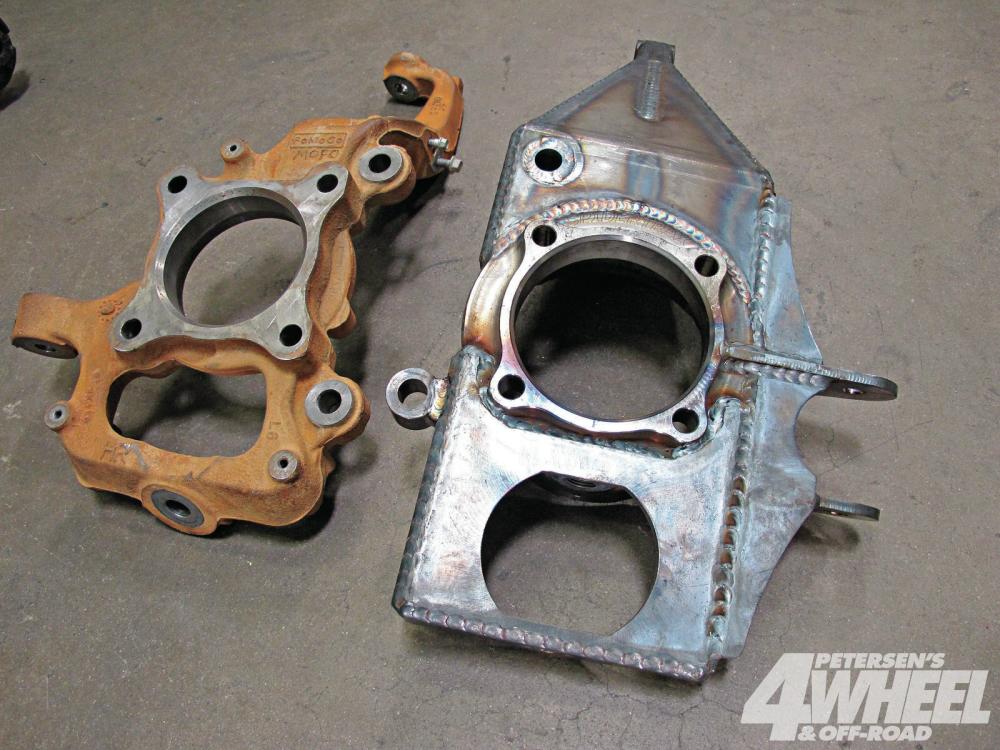
The centersection of the knuckle is a bell piece from Spidertrax. This is welded into the knuckle and has the bolt pattern of many common unit bearings. They chose to use Dynatrac’s Free Spin kit, which uses a spindle, a full-floating hub, and selectable Dynaloc hubs.
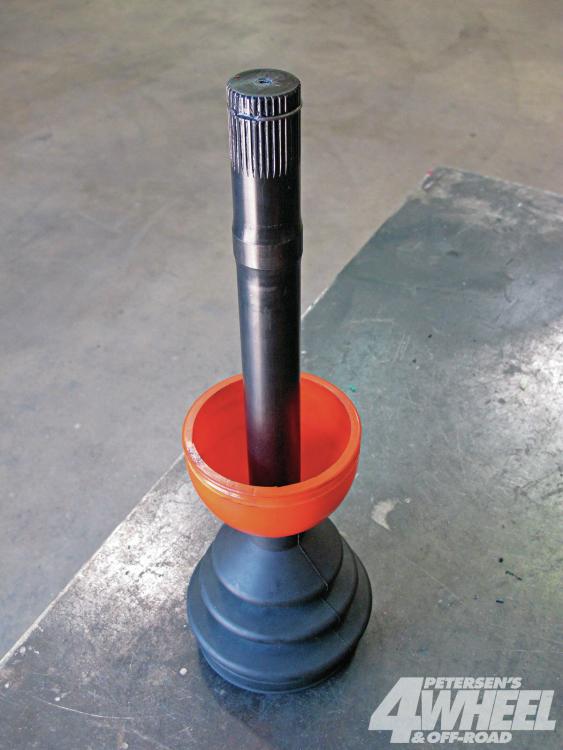
The outer axleshafts are beautifully machined 300M steel from RCV. There are constant velocity (CV) joints at either end requiring custom boots for protection. Note the small snap ring in the groove at the end of the shaft; this will retain the shaft in the CV.
The outer CV is the Dana 60–sized unit offered by RCV with a custom length shaft. These joints are packed with grease and have the stub shaft pressed in place.
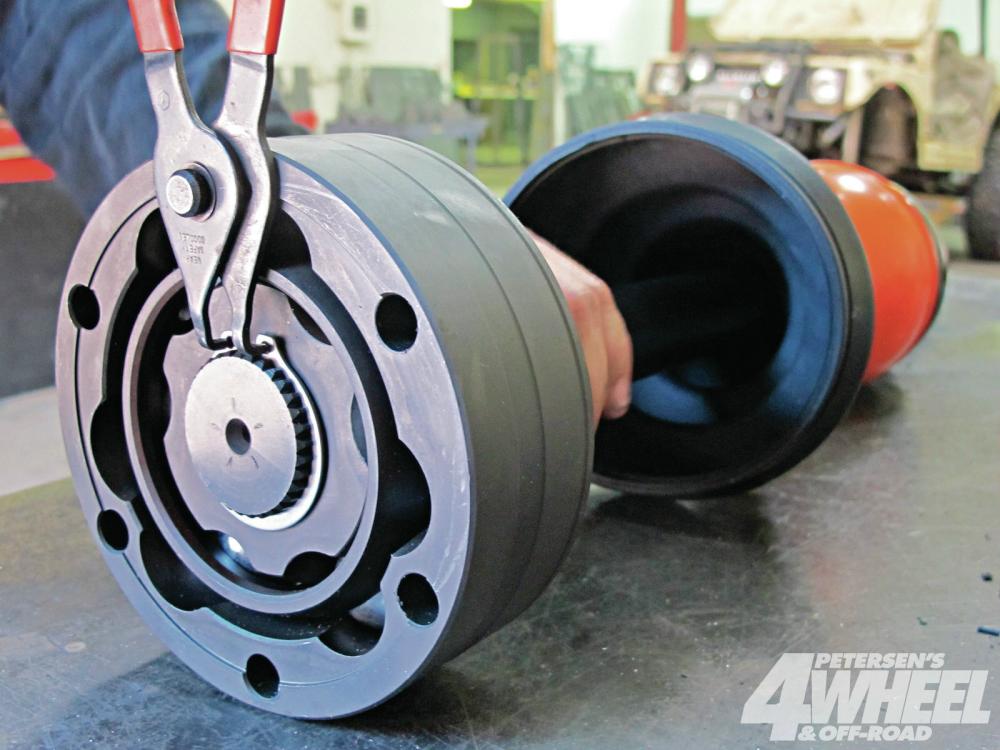
The inner CV is a giant Series 30 unit from RCV retained with a snap ring. These joints are often found in high-horsepower desert race buggies and should prove adequate for our trail vehicle. These are also packed with grease prior to installation.
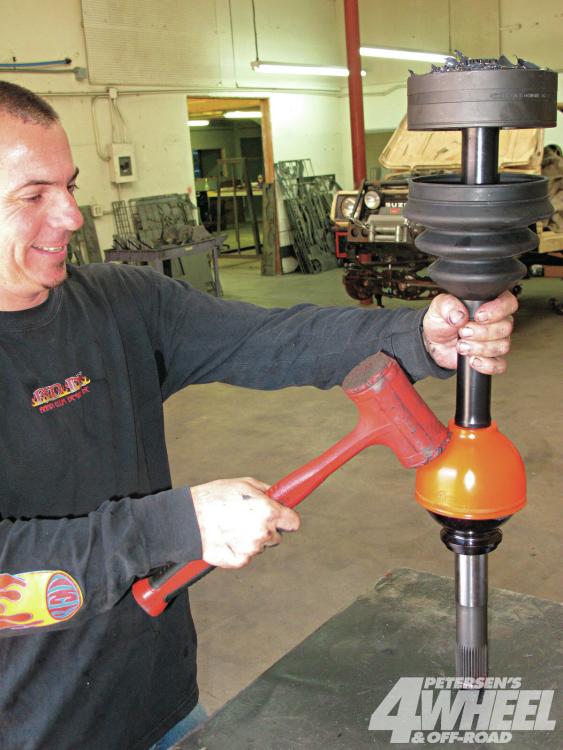
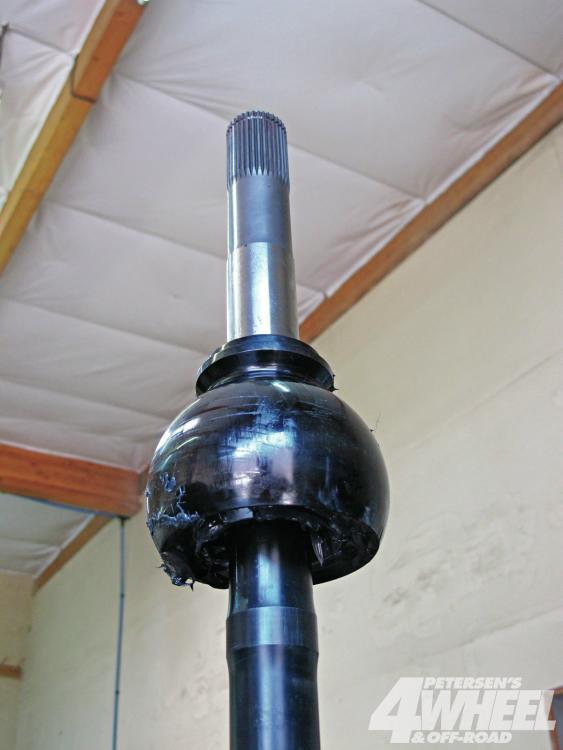
The complete unit is the lifeblood of our IFS. The outer CV boot is whacked in place with a dead-blow hammer, but the inner boot is left off until installed on the truck. Total cost for a custom axle assembly like this would be around $1,800 per side—strong, but not cheap.
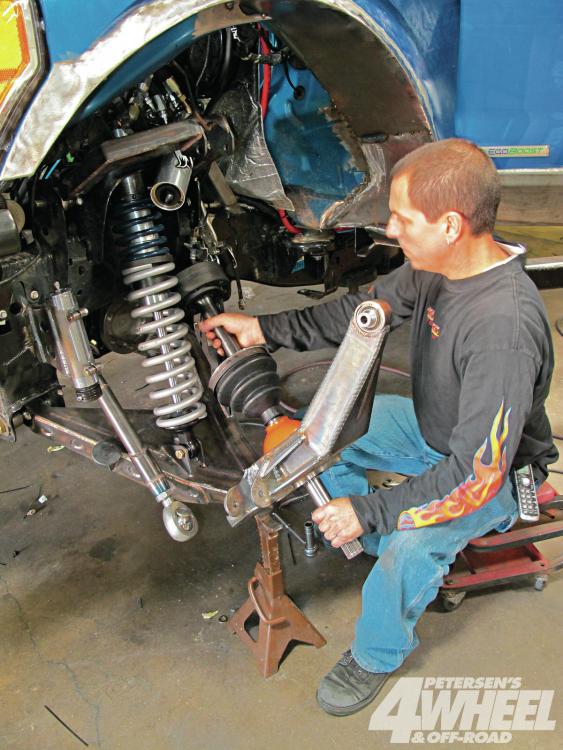
Installing the axleshafts in the truck with the suspension is a complex puzzle that must be done in a specific order. Notice how the upper A-arm is disconnected from the top of the knuckle to allow room for the axleshaft to slide into place.
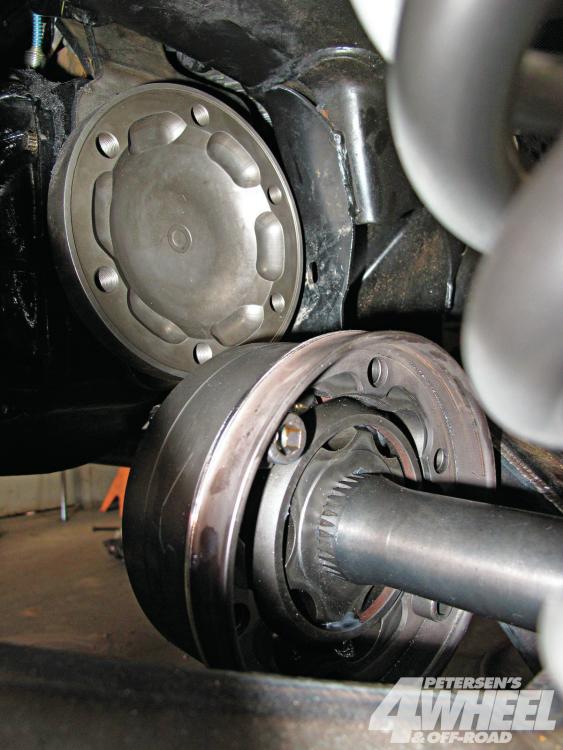
The inner CV attaches to the matching inner axle flange. The flange has been machined to allow maximum angularity of the CV during wheel travel. Six bolts run through the CV and thread into the flange.
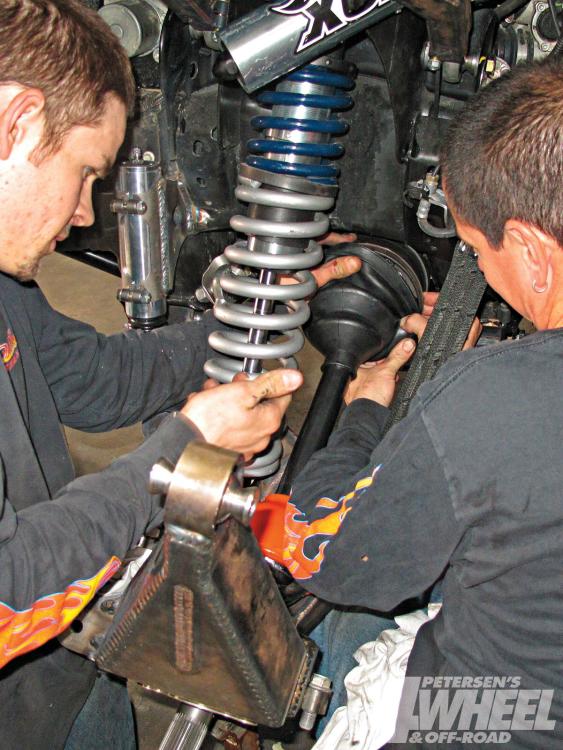
After the CV is installed, a rubber boot is wrestled over the giant ring of the CV. These boots are important to the longevity of the CV, as they repel dirt and retain the grease needed to help the joint survive. When new, the boot is so tight it takes two people to install.
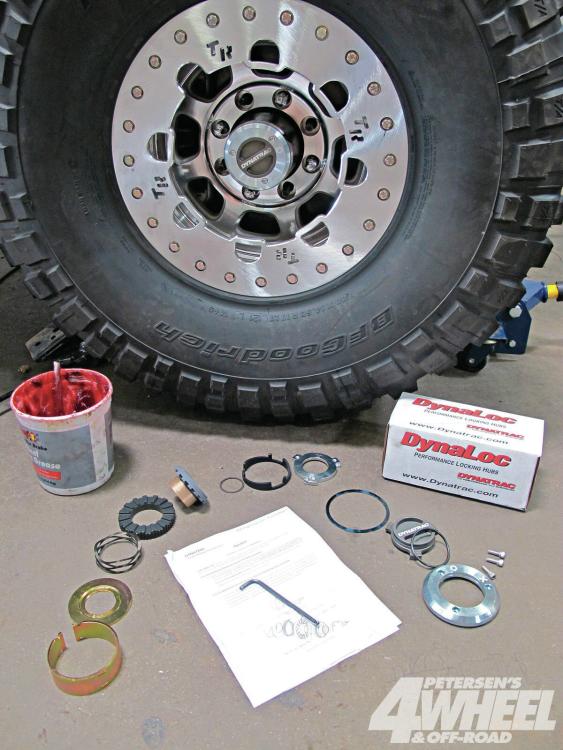
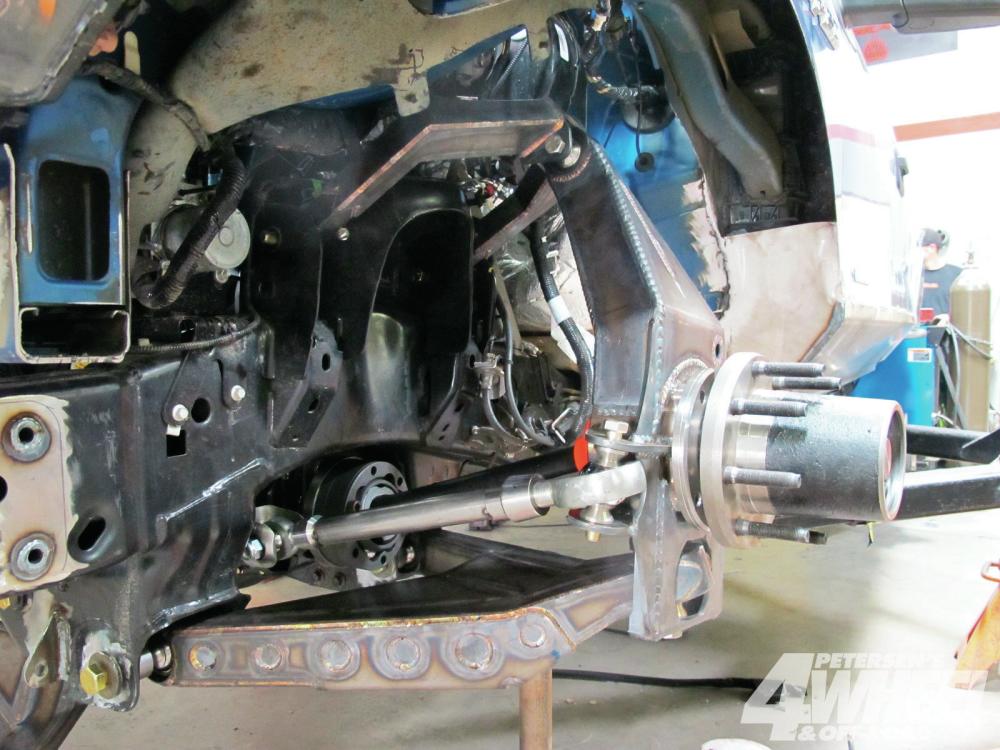
With the axles installed, they proceeded with the Free Spin spindle and hub and then the Dynaloc hubs, both from Dynatrac. Part of the reason they opted for eight-lug was to use these off-the-shelf components.
Rear Axle / Suspension
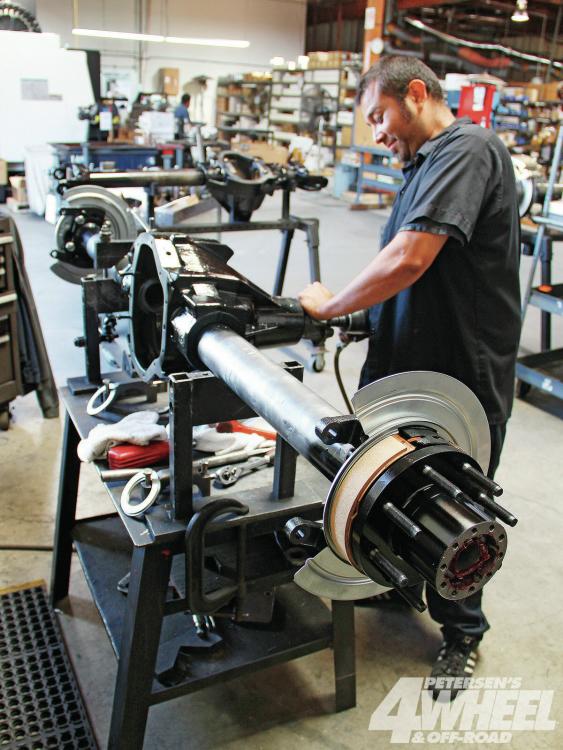
The stock rear axle in our F-150 is a 9-3/4 inch ring gear with locking differential. And as big as that is, they need a stronger axle up to the challenge of big tires and heavy weight from all the armor and tubing, and to be able to support the load of gear, parts, tools, and equipment they’ll have on board. They returned to Dynatrac to build a brawny Pro 80 full-floating rear.

Both the Pro 80 rear and Pro Rock 60 front use 5.38 and ARB Air Locker differentials. The 80 has an 11-1/4 inch ring gear while the front 60 has a 9-3/4 inch.
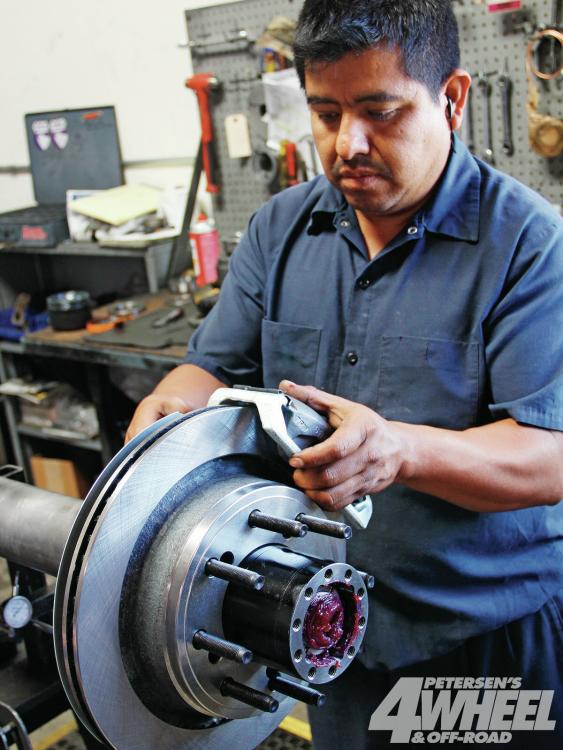
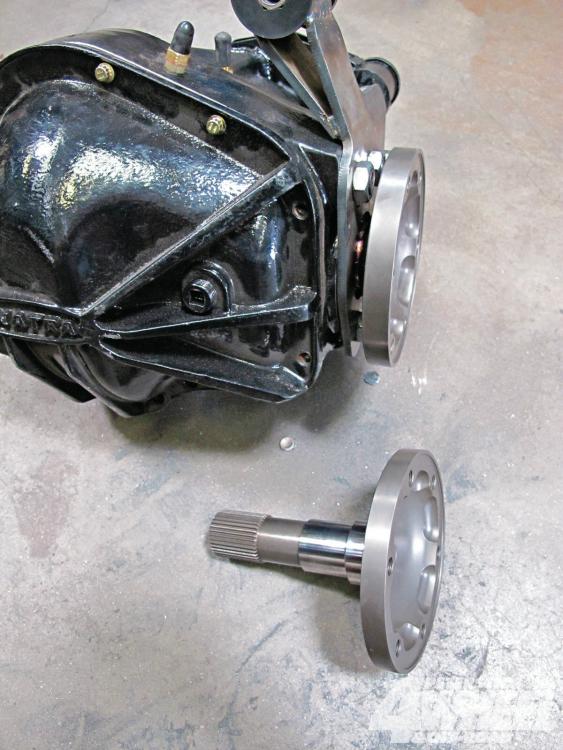
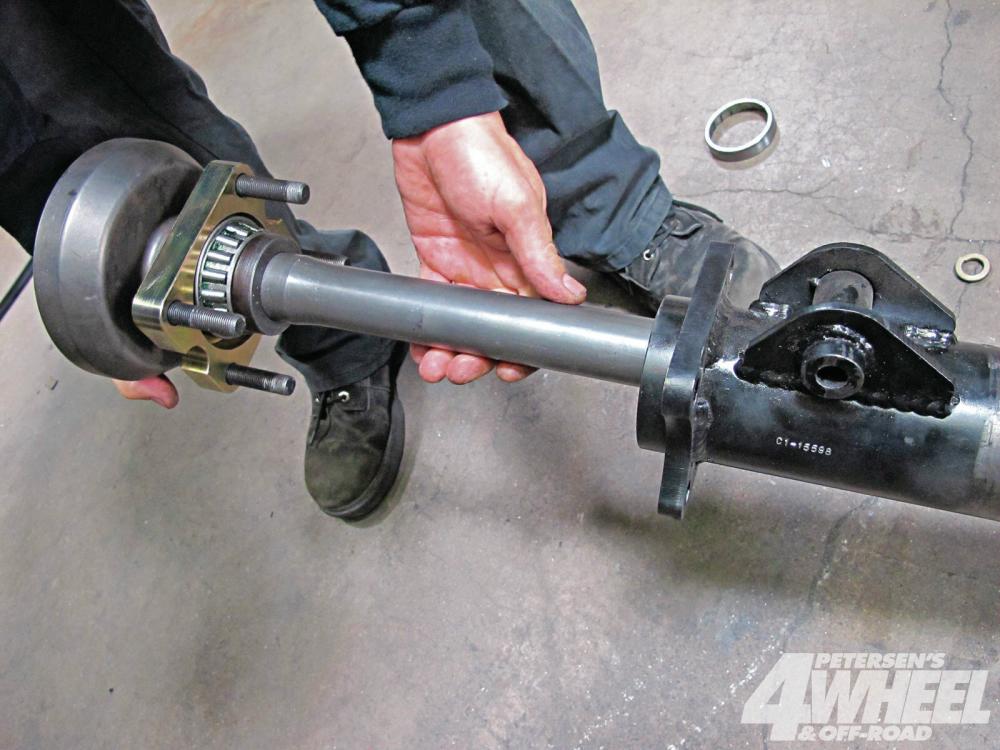
The Pro 80 is fitted with a fixed-spindle, full-floating hub setup that will utilize RCV double-splined axleshafts and custom 35-spline drive flanges from Dynatrac. The rear brakes have built-in parking brake option and use special Jeep rotors that have been machined to an 8 – on – 6-1/2 wheel bolt pattern.
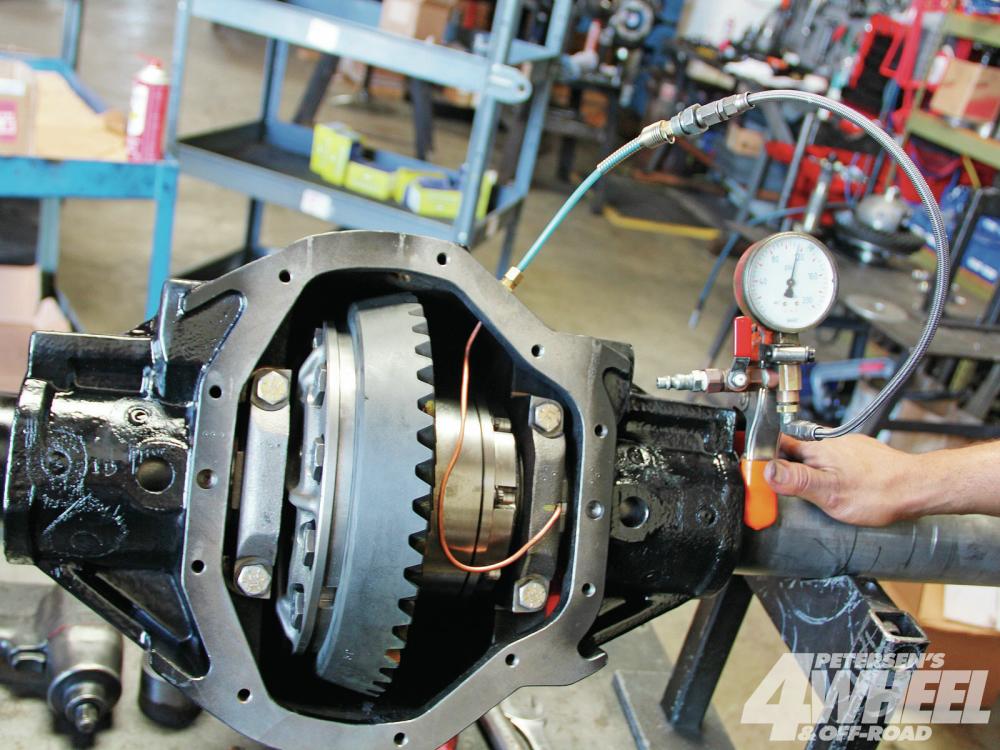
The selectable ARB Air Lockers are a trusted standard of many four-wheelers. They have found that care during installation results in nearly flawless performance from the ARBs, and they have never had an issue with a Dynatrac-installed Air Locker. Routing the internal copper line and proper tire pressure testing are important precautions.
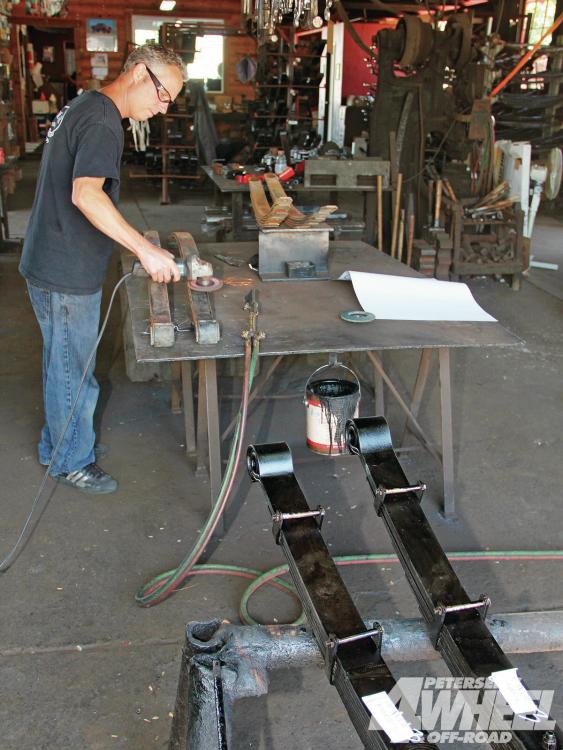
To support the F-150 above the Pro 80, they went to Deaver Spring for a set of its long-travel Raptor/F-150 rear springs. Deaver makes springs for everything from race trucks to car trailers. With a full line of replacement and lift springs or custom built and repaired springs, Deaver had our suspension sorted.
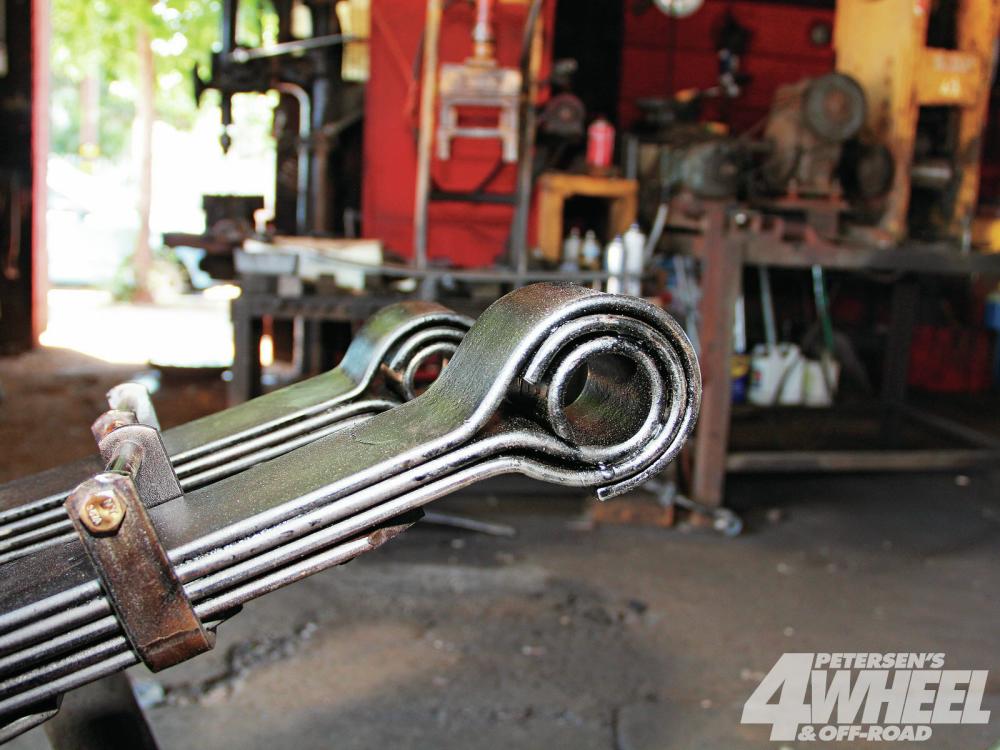
These leaf springs are just slightly taller than stock, but with adequate fender trimming, different shackle hangers, and the larger axletubes, they will clear our 40-inch rubber. The Deaver springs also have a military wrap and torque wrap to reduce wind up of the leaves and still be strong under power.
In the rear the leaf springs hang from the factory front spring hanger and custom shackles built to pivot off the rear bumper. Made of 1/4-inch chromoly plate, they should be adequate against trail abuse.
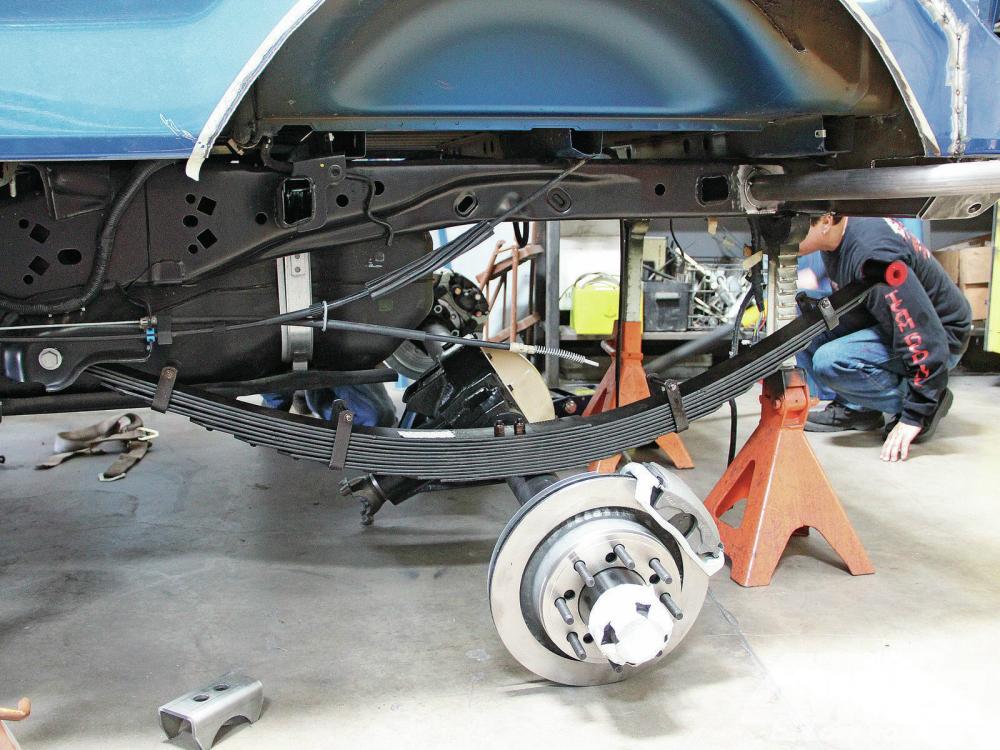
Swinging the Pro 80 into place and setting up the leaf springs is not easy. They initially went with a 3-inch lift pack, but the truck sat way too tall. They also had a custom driveshaft built to deal with the rear slip yoke of the transfer case, and that required changing the pinion angle from stock.
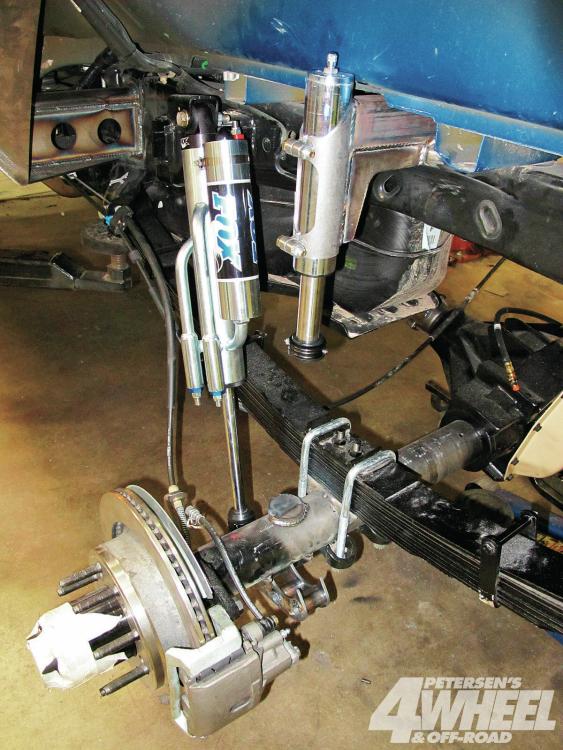
To control our rear springs they went with a set of Fox three-tube bypass shocks with a 2-1/2 inch body. These shocks are overkill for a rockcrawler, but when you are building an IFS trail truck there is no guarantee it will only be a rockcrawler. Plus our prior experience with Fox Racing has been phenomenal, so they were excited to use its product. They also ran Fox air bumpstops at each corner. The front uses 2-inch travel units and the rear 4-inch. Notice how the bumpstop mount is built away from the frame to clear the leaf spring at full compression.
Bumpers
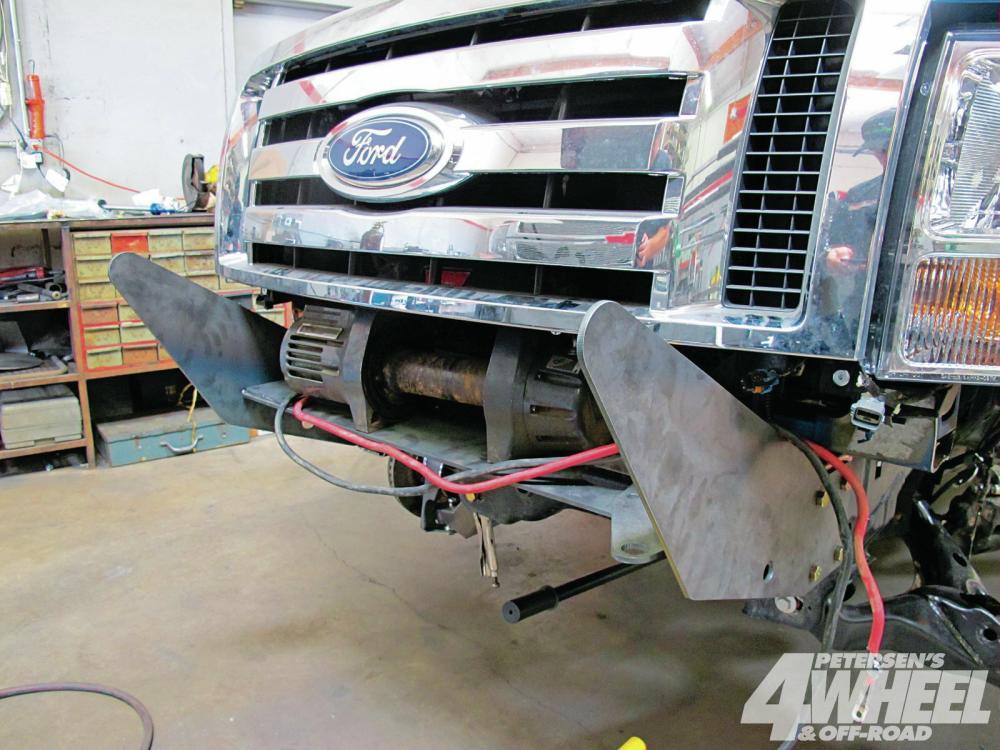
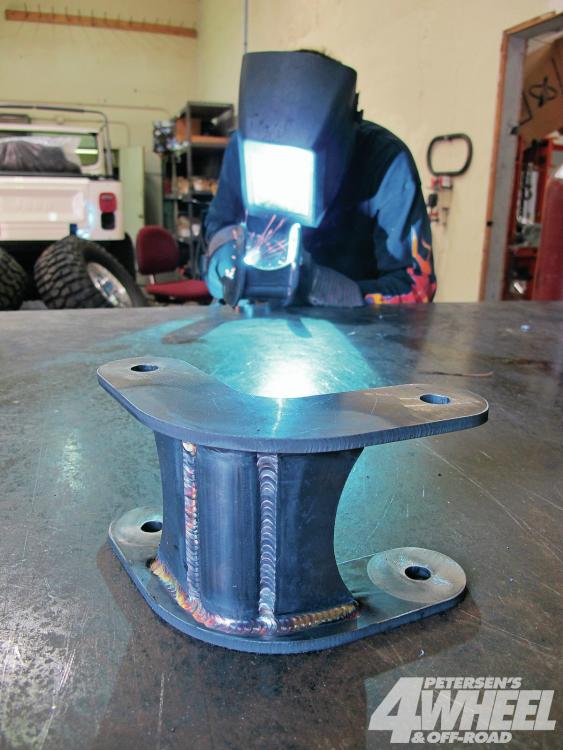
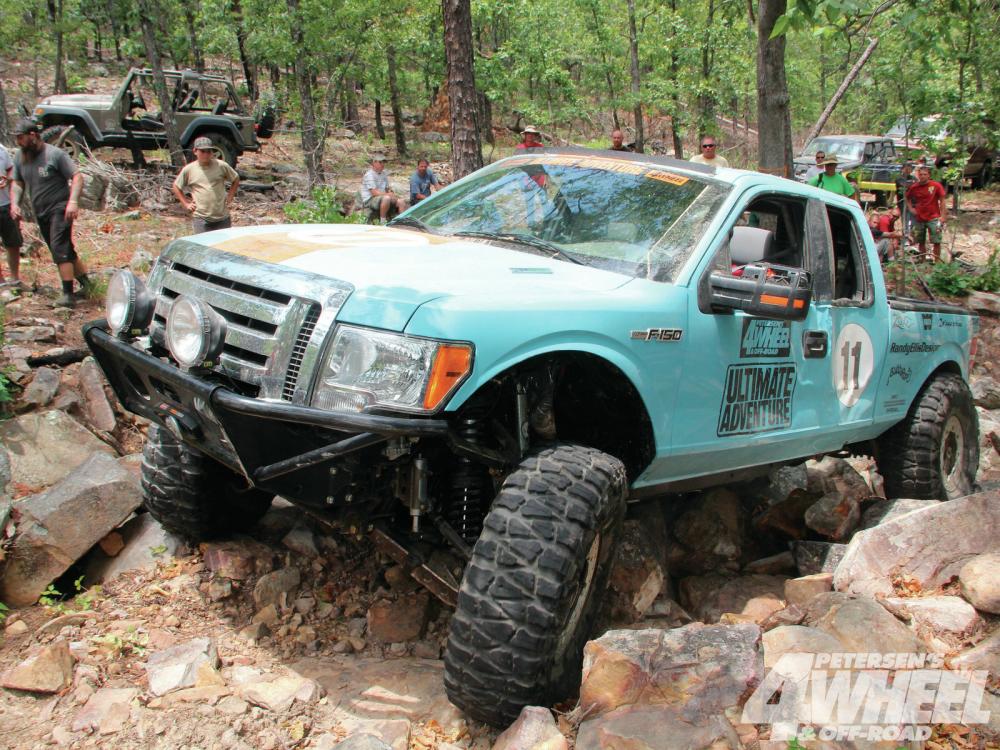
Up front the F-150 will be hauling a new Warn CTI winch and some off-road lights, so a bumper was designed to support them without decreasing approach angle or protection. The Randy Ellis Design team started with 1/4-inch steel uprights and a horizontal winch base plate.
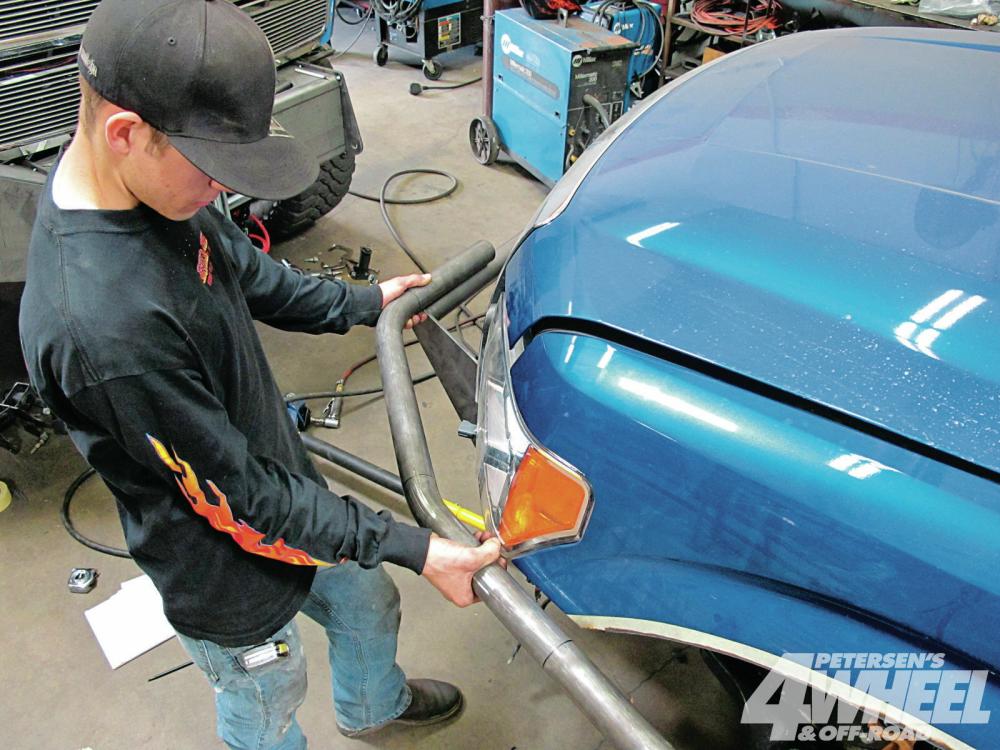
Next, they began bending 2-inch tubing to protect the front corners of the truck. New-style pickups like the ’11 F-150 have nice, yet expensive, headlights. A well-built bumper should protect them from rock and tree encounters.
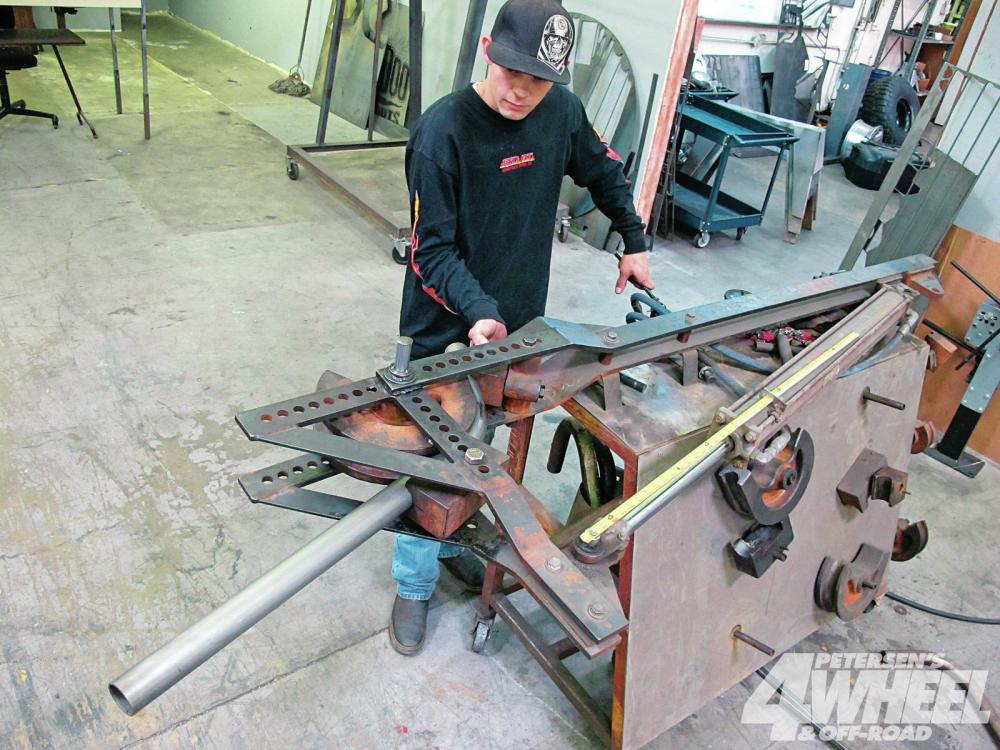
A large hydraulic tubing bender is used to make the bends. Note the hydraulic ram, which is powered by a 110V hydraulic pump. The length of the ram shaft is measured so that the bends can be duplicated and both sides of the bumper will match.
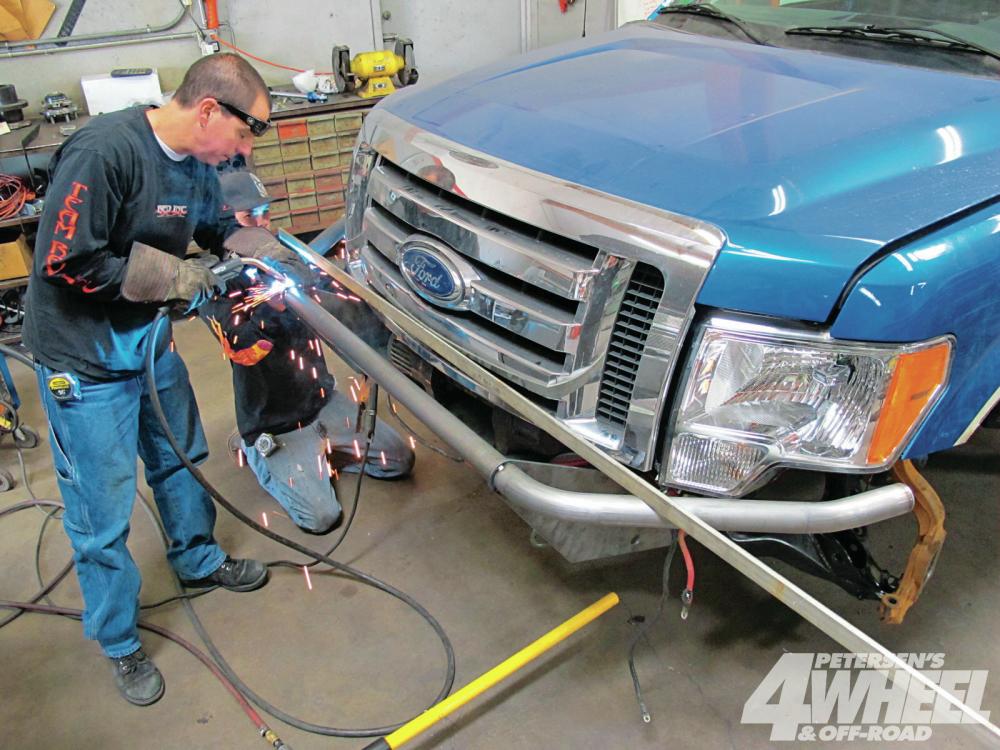
As with all the fabrication on the truck, nothing is welded together without careful measurement. Many parts are simply tacked in place with the Miller MIG welder until further steps like suspension, tires, and steering are finished, just in case something needs changing.
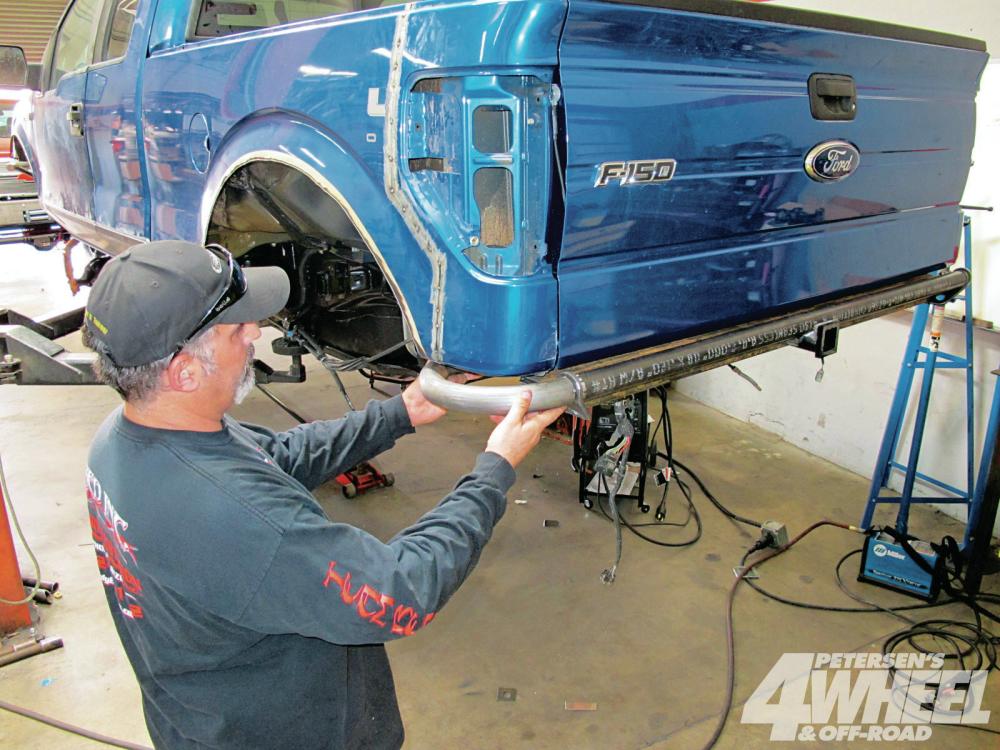
Rear bumper duties include taillight protection; clean departure angles, tailgate use, recovery points, and trailer hitch integration just in case the F-150 ever gets hitched. Again 2-inch tubing and 1/4-inch plate were used for strength and simplicity.

Behind the rear bumper is a heavy piece of rectangular tubing that replaces the rear frame section that had been cut off during the bobbing of the tail end.
Rollcage
Putting a safe rollcage in a truck that still allows driver/passenger comfort and daily use is tricky. First, the entire cab must be gutted of seats, carpet, and everything else.
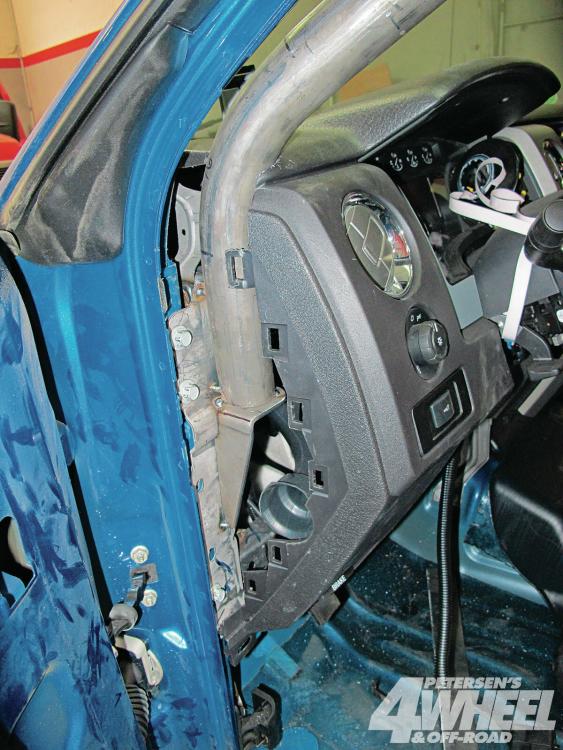
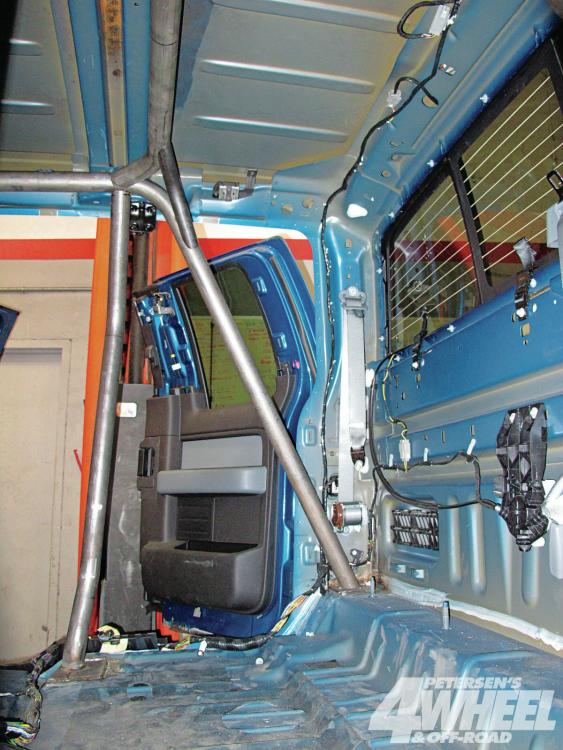
There are many different ways to build a rollcage, and on a new truck like the F-150 the cab is already very strong structurally and built for general occupant safety. They used that to our advantage and made the cage a part of the cab structure by welding the tubing directly to the pillars, firewall, and floorboard.
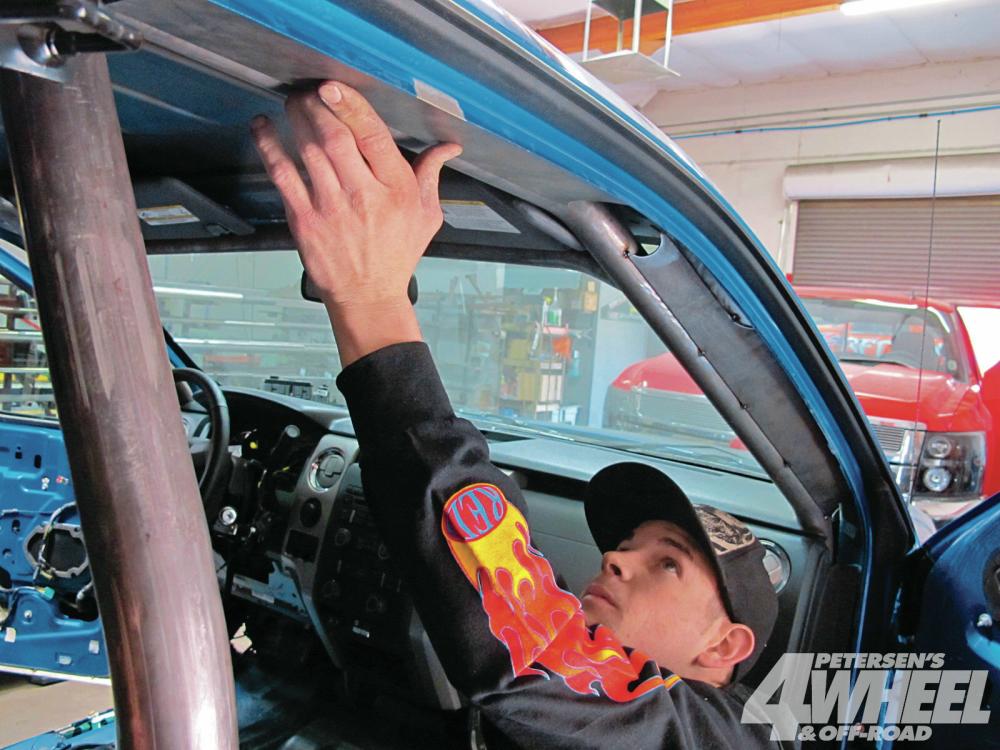
Above the door openings the cage has plates that tie into the cab similar to the style used in many off-road rally cars. However, they are not tying directly to the frame with the cage; rather, they are relying on the beefy body mounts to secure the cab yet muffle noise from the suspension and drivetrain.
The finished bar is safe and secure and will allow both front and rear seats to be used and retain the recline feature should the passenger want to catch some Zs on long road days. Access to the rear seat isn’t easy but still possible, though it will typically be storage for gear.
Miscellaneous
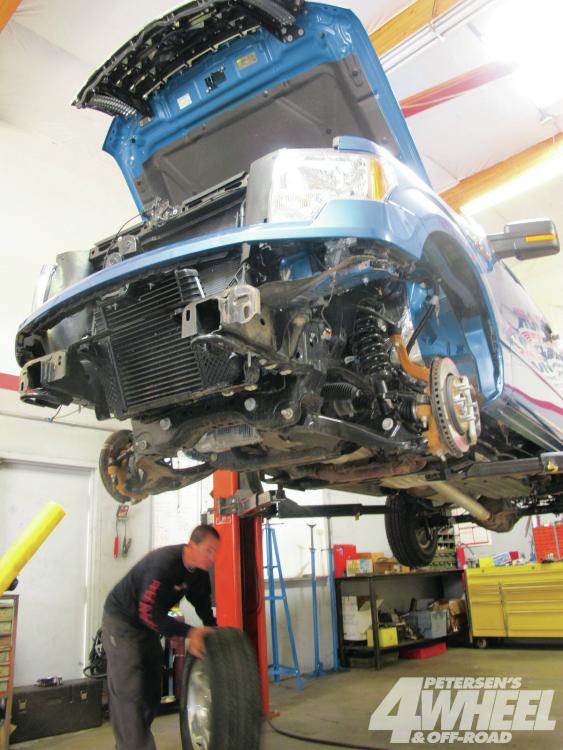
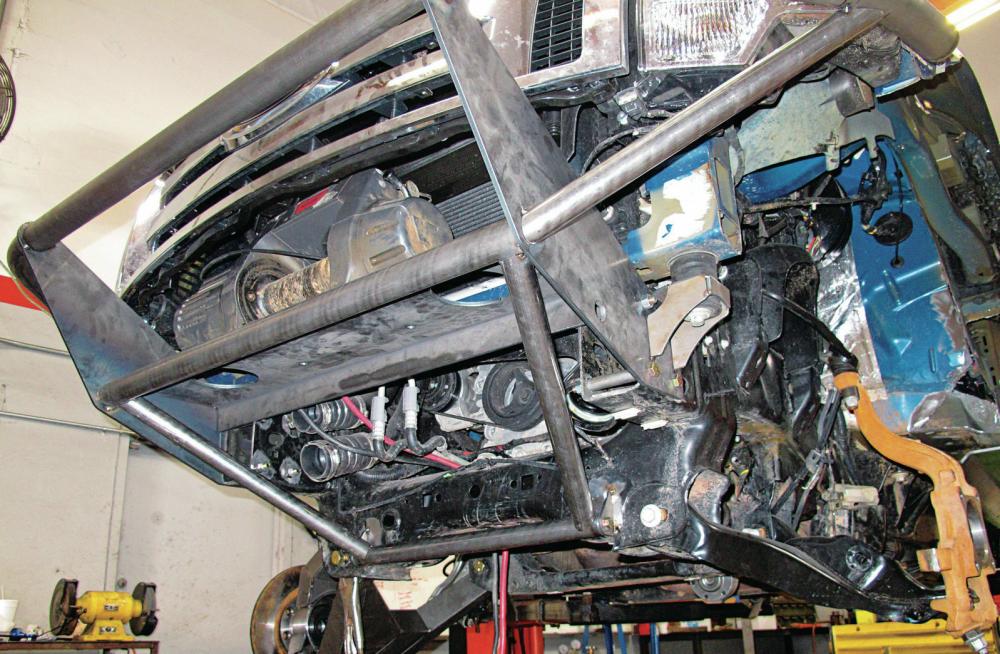
From the start they found a few issues that need to be addressed. First is this low-hanging intercooler, which hides just behind the bottom of the factory front bumper. With the bumper gone, it’s very exposed. The EcoBoost engine uses two turbos for forced induction, but an intercooler is needed to cool the charged air and boost power, so they don’t really want to delete it. Unfortunately, what works for airflow is a hindrance to approach angles and winch mounting.

The EcoBoost V-6 has two turbos feeding an intercooler that cools the air charge into the engine, resulting in additional power. They had to remove the intercooler to mount the winch and were not able to put it back in due to its size, plus they were worried about mud clogging the intercooler during the trip. Justin Scheller from Randy Ellis Design fabricated an aluminum intercooler.
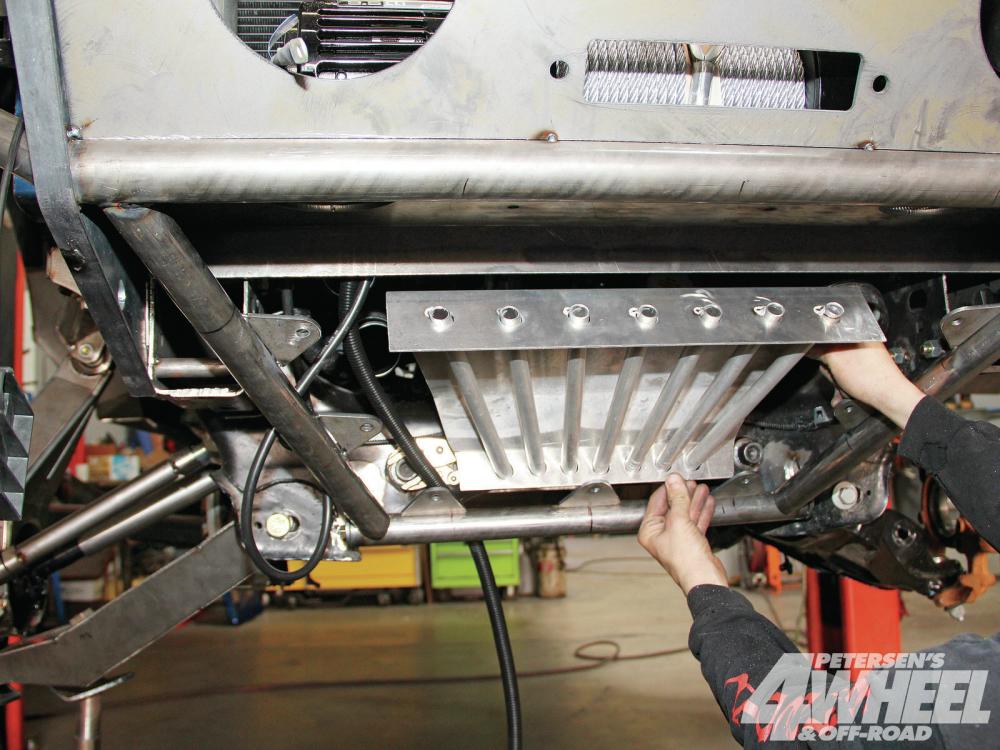
The aluminum tubes run through a sealed aluminum box that is fed by the turbos and have cool fresh air running through them during on-road travel to cool the charge from the turbo. It isn’t as efficient a design as the factory piece, but it is less likely to clog with dirt. (Seeing as the trip is already over, they can say the truck was never short on power.)
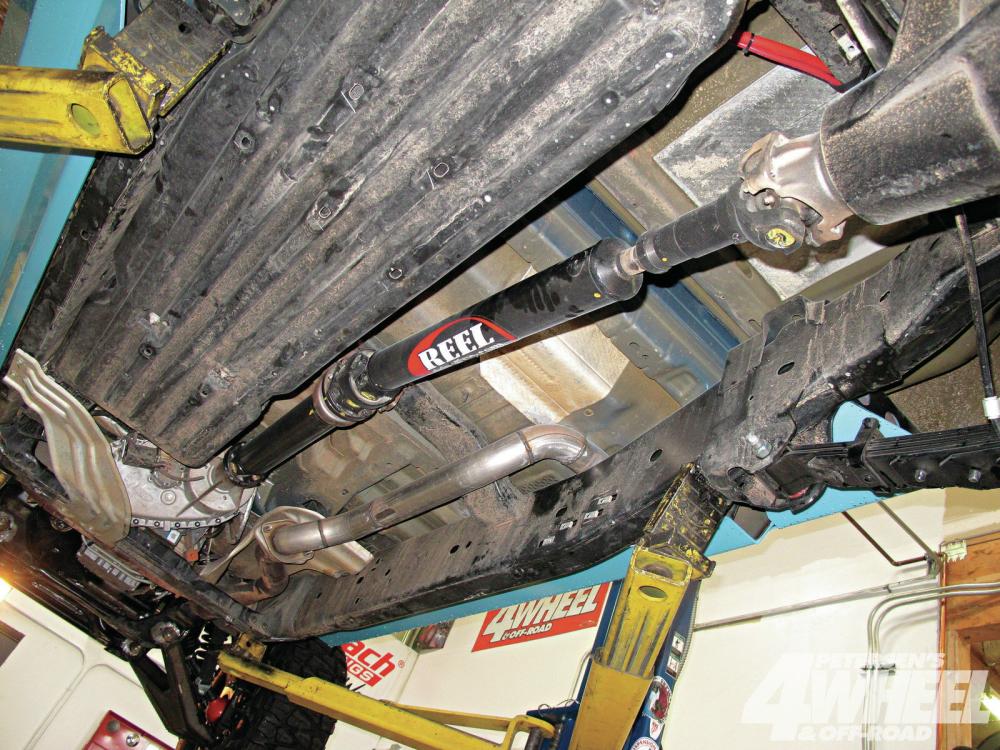
Because the transfer case Ford uses has a rear slip yoke, they opted for a two-piece driveshaft From JE Reel Driveline. The front section uses a slip yoke, then a carrier bearing, and then the rear section with a slip spline section to allow for suspension movement. Our exhaust system was also finished at this point, deleting the muffler and rear tube with a simple passenger side dump.
Body
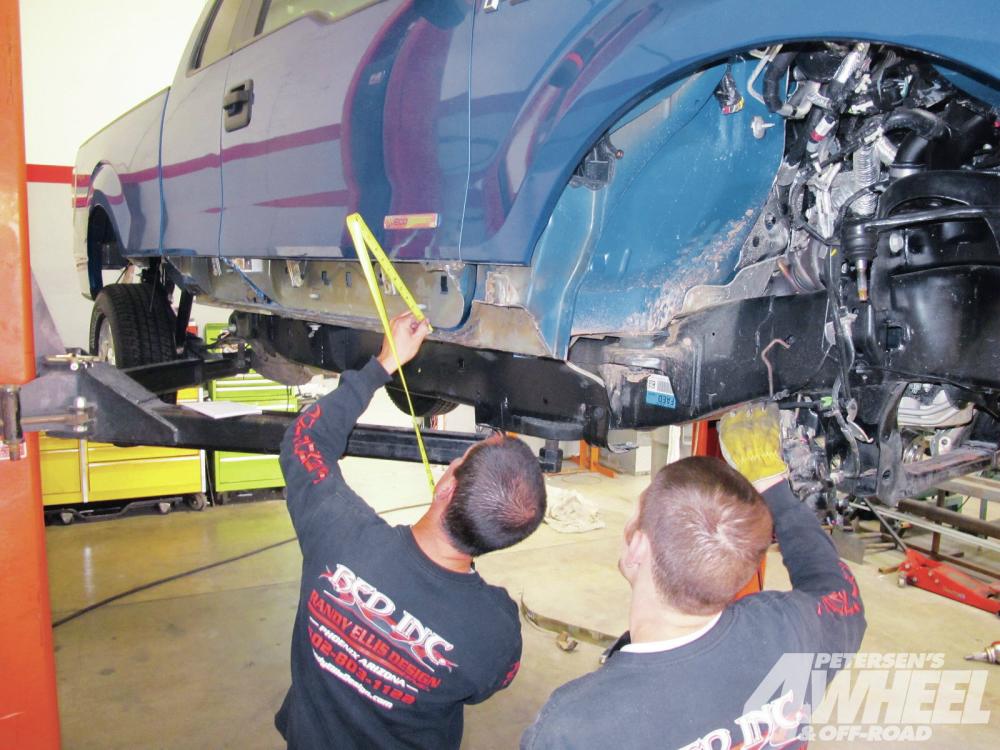
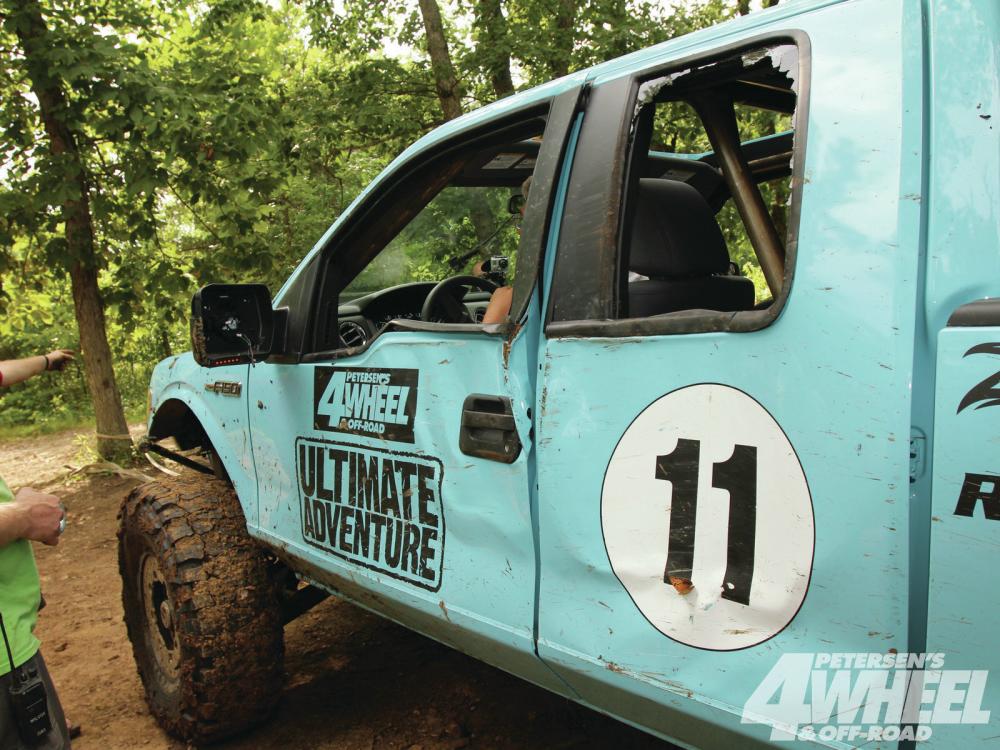
‘Boat-siding’ the F-150 will raise rocker panels and replace thin sheetmetal with 3/16 inch steel plate. Ellis designed a modification that involved cutting the doors at an angle so the inside still seals out weather and mud, but the outside cut is higher for better clearance. The cab body panels below the door were chopped off.
The plate is formed under a 40,000-psi press brake. Care is taken to get the perfect angle down to the last degree. These parts will see their share of abuse on the trip, but that’s no reason not to build them as near-perfect as possible.
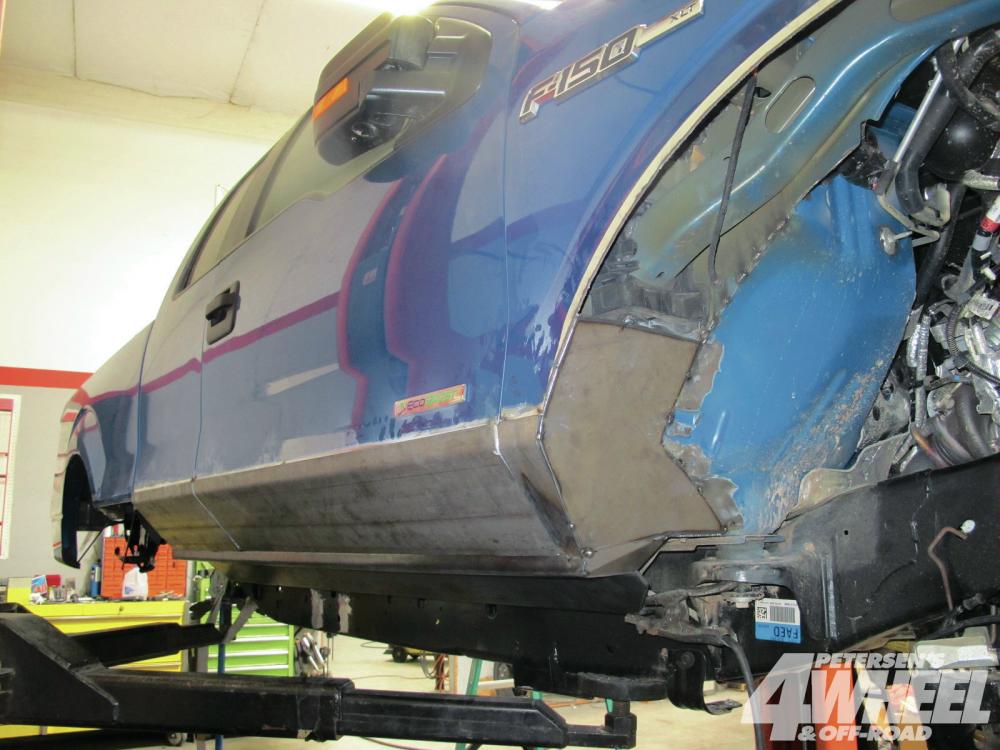
Voila! As if by magic, the bottom of the cab is that much closer to rock-proof. The plates will be welded to the door panels and interior supports, but everything is tacked until later.
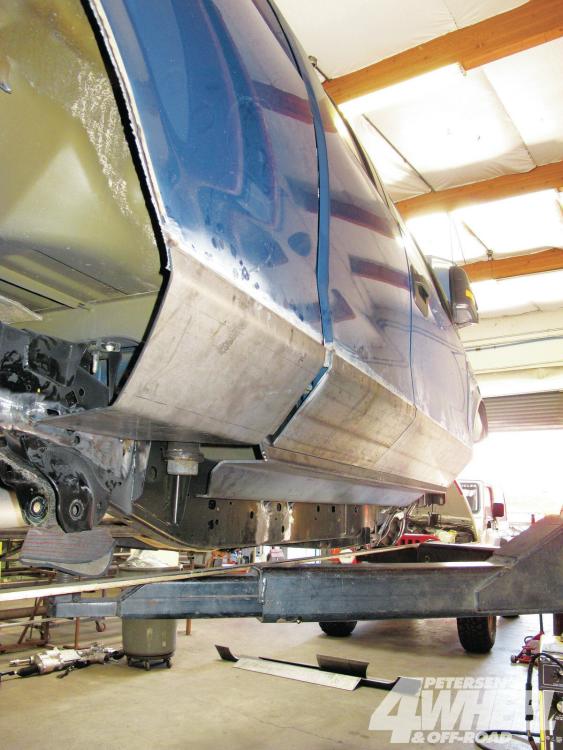
A rear bed panel matches the cab lines and will protect right up to the big tires they’ll be running (more on those next time). The boat-side rocker panels will also be integrated into the rollcage.
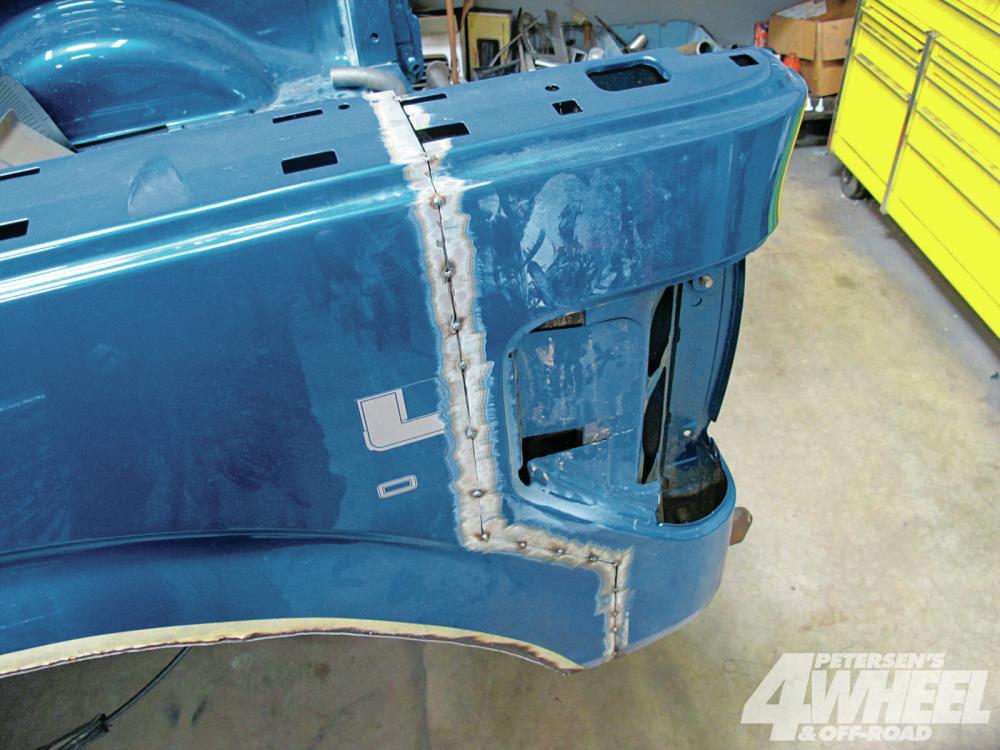
The truck bed was trimmed about a foot for greater departure angle, but the cut line required some zig-zagging to retain the wheelwell opening and taillight. A straight cut inside the bed was made, and everything was then tacked back in place.
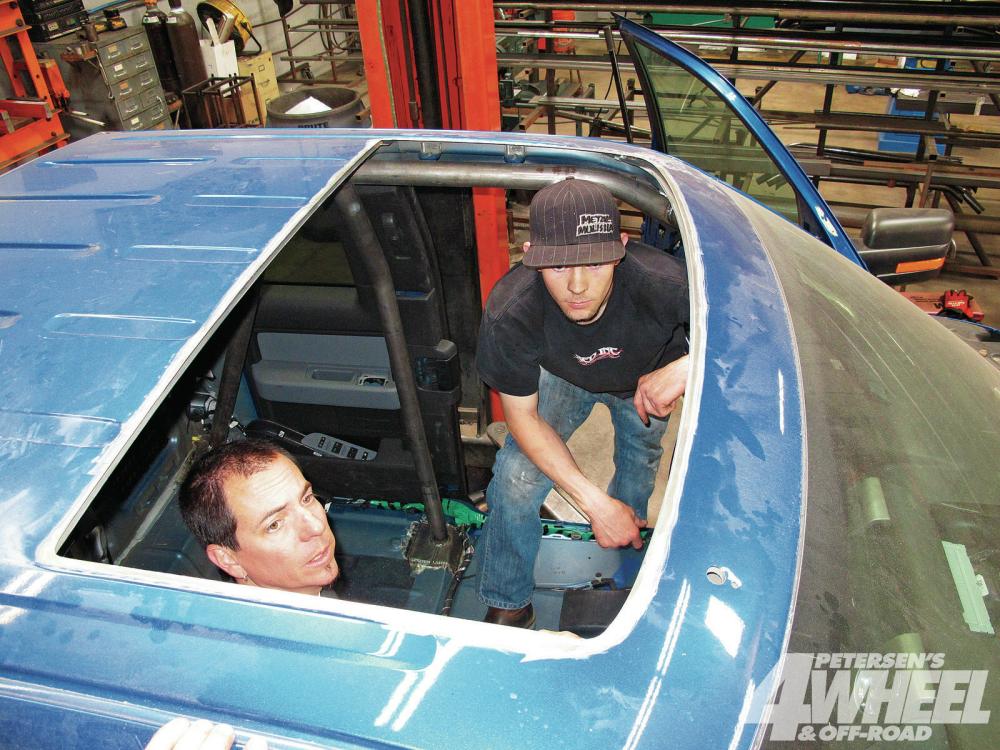
The Randy Ellis Design crew added some ventilation and visibility to the F-150 in the form of a custom sunroof opening. A snap-on vinyl top will be made for inclement weather.
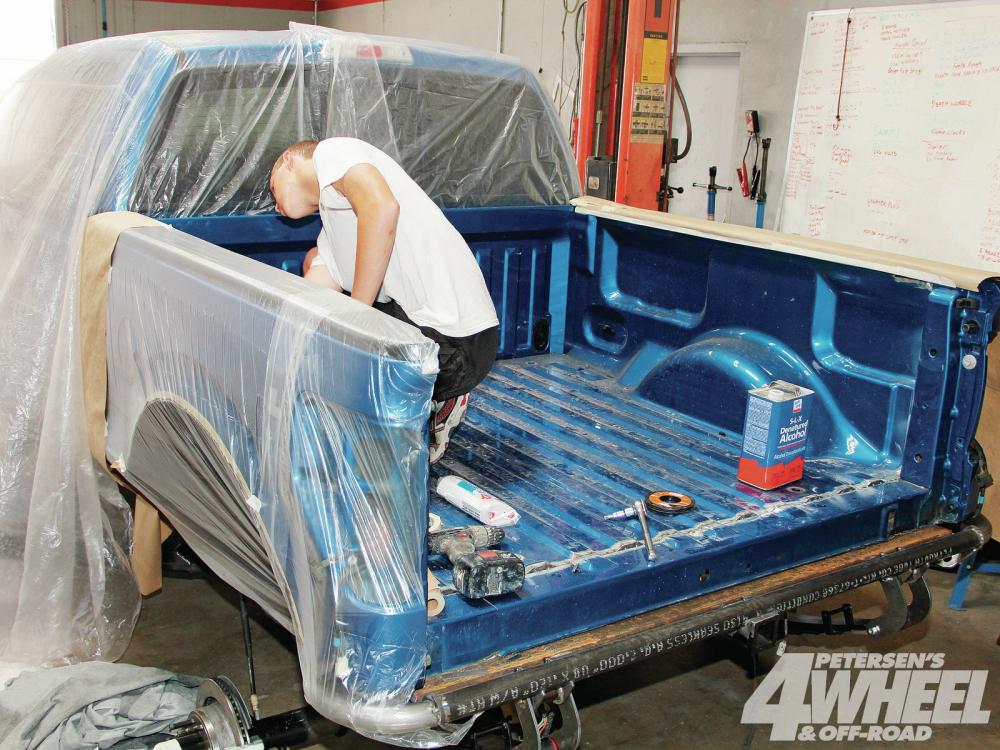
While the springs and shocks were finding a home under the bed of the truck, the guys from Coverall Technologies where prepping the bed for a spray-in bed liner. They opted for a spray-in liner to cover the seams where they bobbed the bed of the truck.
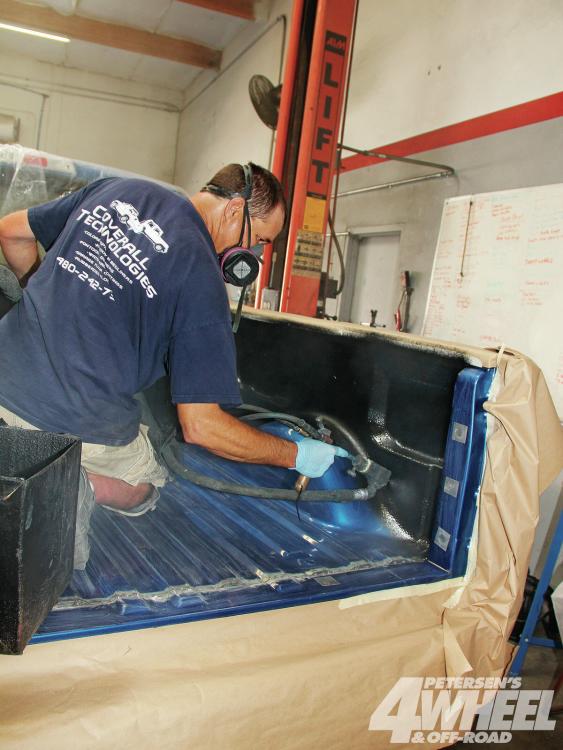
Coverall uses the Vortex bed liner system, which allows them to come to your home or shop and spray your pickup bed with very little overspray due to low-pressure application. They can also spray your garage floor, deck, or whatever needs a quick-drying, high-impact, durable coating to protect it from use and abuse.
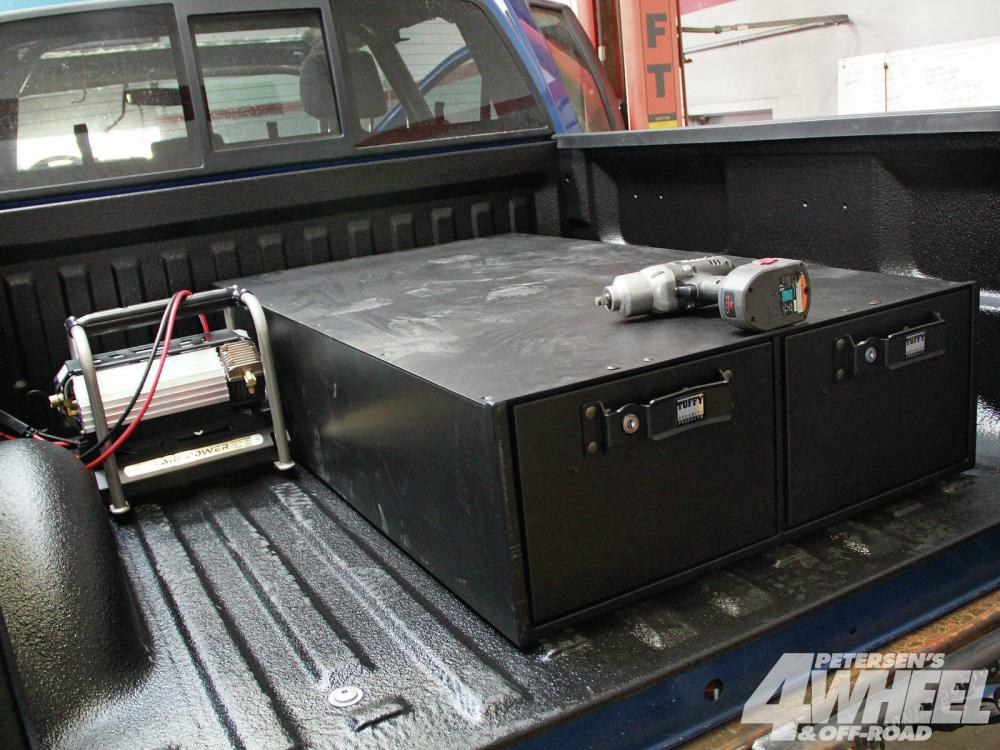
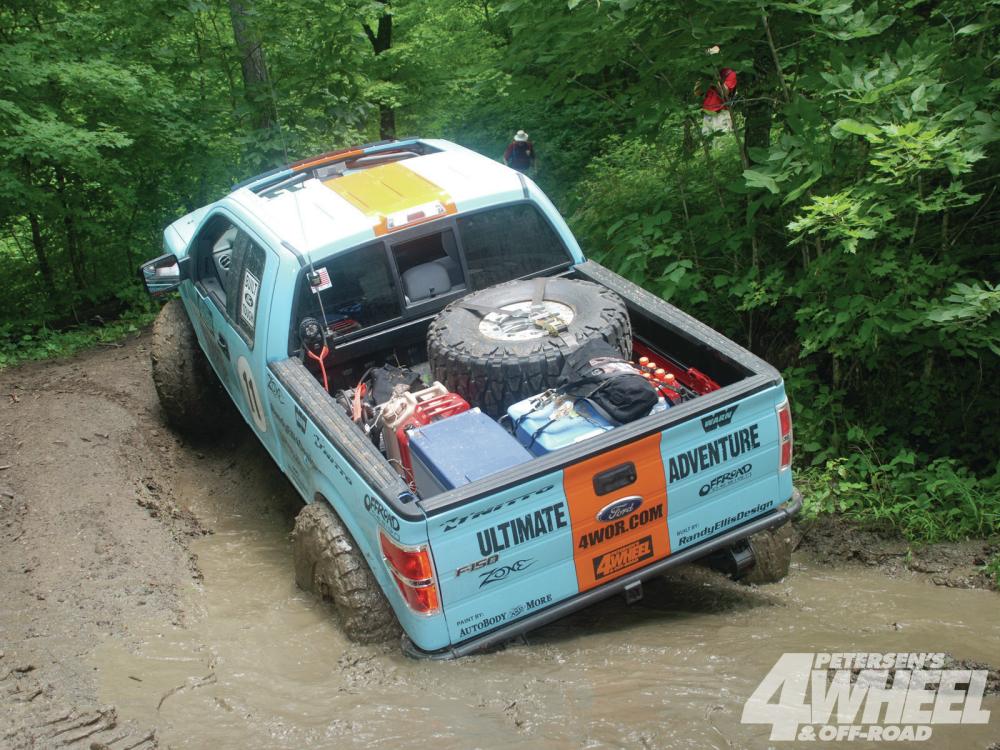
Once the Vortex Bedliner was dry they installed the custom two-drawer Tuffy storage box. This lockable steel box will house all our tools and spare parts.

The long dual drawers have a strong sliding mechanism to support the weight of spare driveshafts and axleshafts, a large selection of tools, and sundry bits to keep our Ultimate trail truck running. In addition to time and money, they are out of space for any more buildup this month, but they’ll return next month to show you more of the IFS assembly and the hundred other things they had to finish such as front shocks, exhaust, driveshafts, paint, lights, and wiring.
With all of the work done, the truck was taken for a test drive before it headed off to paint.
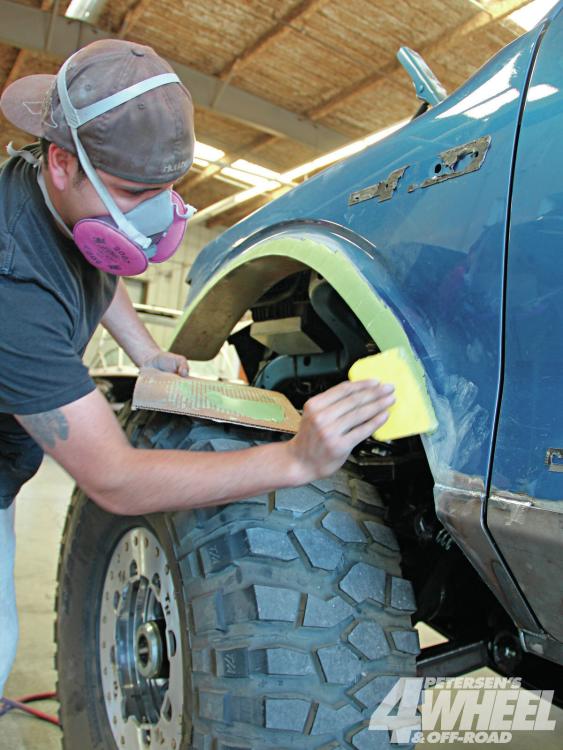
With the truck finished they raced to Northern California for paint at Auto Body and More. The Randy Ellis crew had done an incredible job of opening up the wheelwells for the 40-inch tires, but a skim coat of Bondo was needed to fade in the wheel openings and hide where the bed was bobbed.
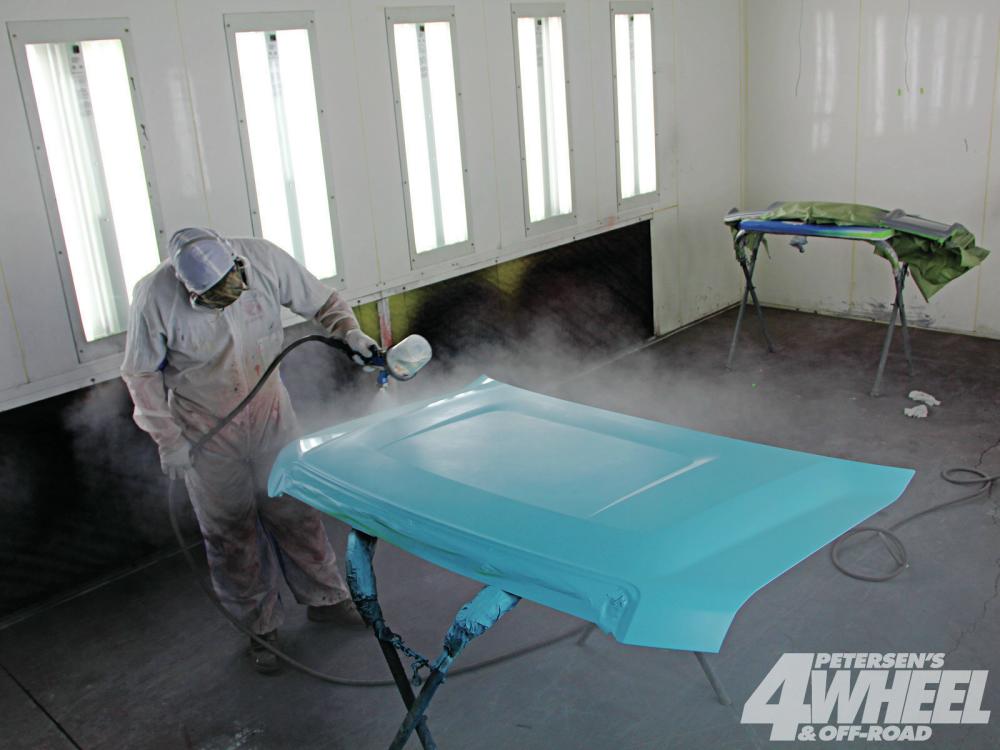
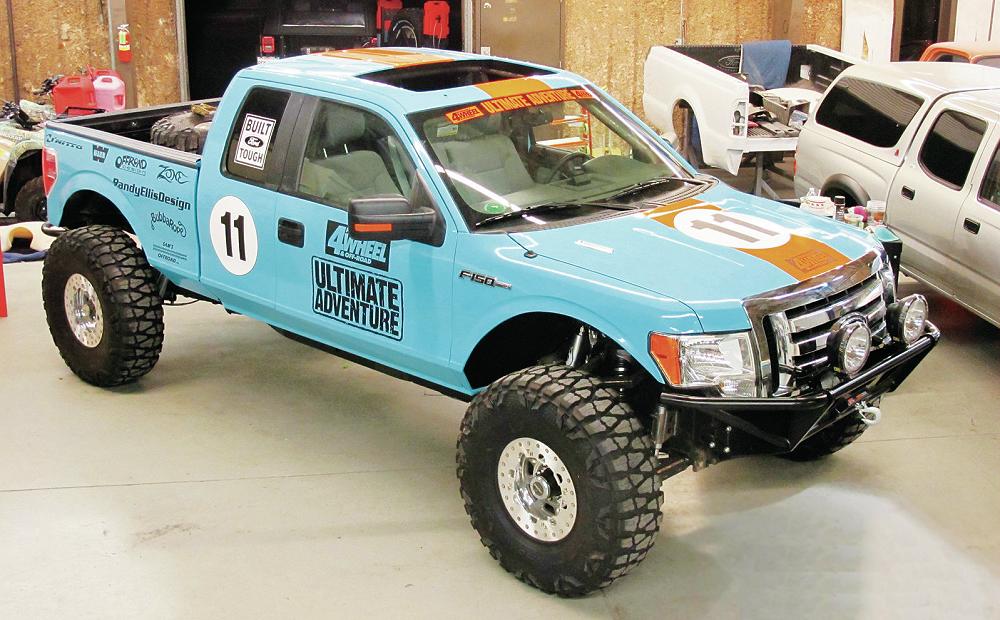
The doors, tailgate, and hood were removed and painted. The paint scheme they used is known as the Gulf livery, taken from the Le Mans racing Ford GTs that were sponsored by the Gulf Oil Company in the late 1960s.
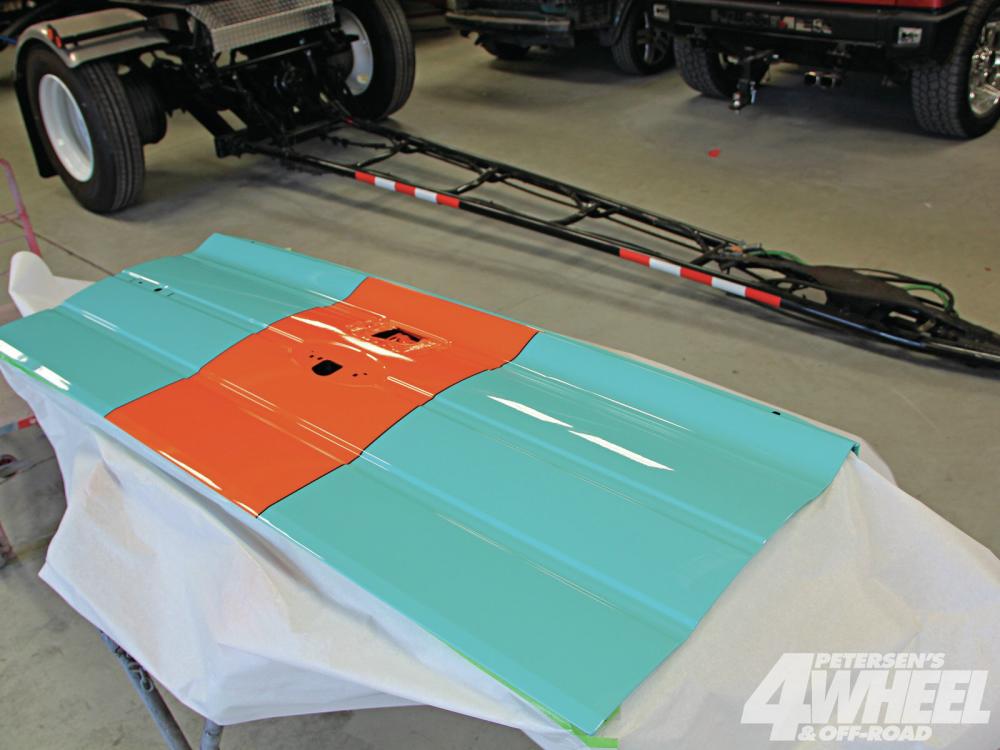
The orange racing stripe that runs from stem to stern will help the truck pop in photos and stand out in the crowd. They don’t expect many of you to copy our paintjob with your Ford 4x4s, but they can tell you that brightly colored vehicles make for better feature trucks.
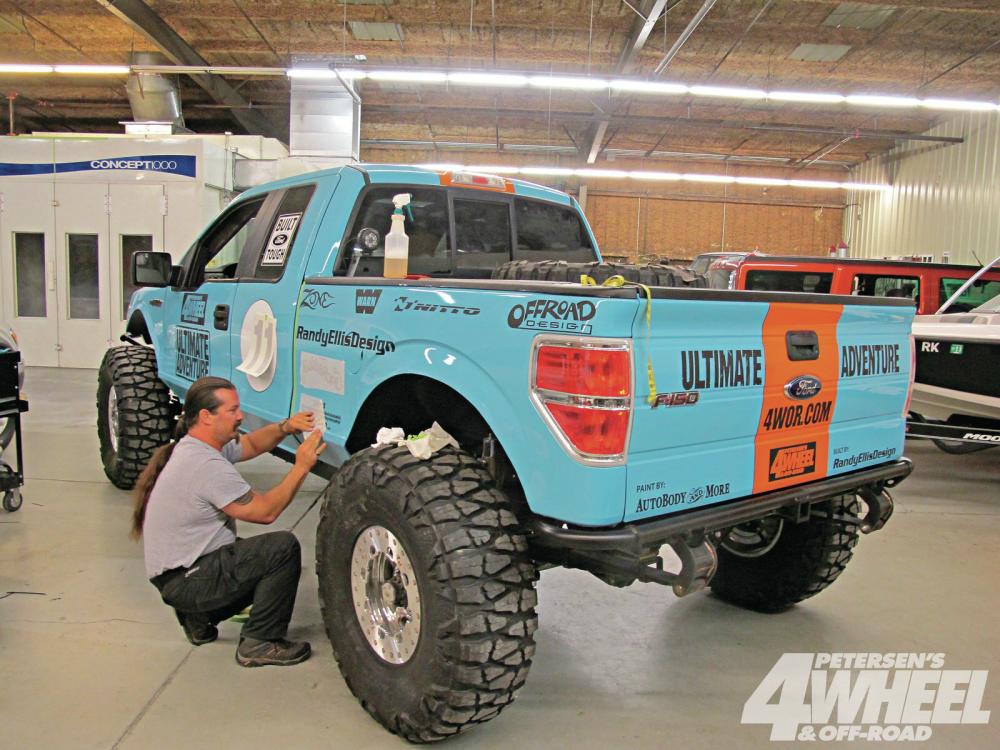
Ram Print arrived the night before they left and worked into the night to apply the sponsor logos on the truck. The giant “11” is for 2011 and the 11th Ultimate Adventure. The 40-inch Nitto Mud Grapplers on Trail Ready beadlocks arrived while they were at paint and were quickly mounted for the trip.
Links:
Fourwheeler – Ultimate 2011 Ford F-150 EcoBoost
4-Wheel Off-Road Ultimate Adventure
More Photos:
Click the photos to enlarge

About The Author
Growing up, my father always believed that every family needed a truck—there’s just something about having a vehicle capable of hauling anything at a moment’s notice. That philosophy stuck with me, and it’s been the foundation of my lifelong passion for Ford trucks.
While I’m best known for my work with Ford Rangers, I’ve owned a wide variety of Ford trucks over the years—including F-150s, F-250s, F-350s, and even larger rigs like the Ford Excursion, Ford Expedition, and a 1982 Ford Econoline Sportsmobile camper van. I’ve used these vehicles for everything from family transportation to towing car trailers and campers, and each one has fueled my love for Ford’s versatility and durability.
I especially enjoy the styling of 1970s and 1980s Ford trucks—the bold designs, rugged presence, and classic charm are timeless. Sharing my passion for Ford trucks, vans, and SUVs with other enthusiasts online brings me a great deal of joy, and it’s why I created Blue Oval Trucks.
This website is dedicated to helping Ford truck enthusiasts explore, learn about, and celebrate these incredible vehicles. While I share my expertise and experiences here, Blue Oval Trucks is an independent enthusiast site and is not affiliated with Ford Motor Company.